Wednesday, December 28, 2011

Hop Around Houston

Hop Around Houston is a shop hop around the vendor area of the International Quilt Festival.  It works just like a regular shop hop...you travel from specific shop to specific shop and purchase a little kit at each booth for a different quilt block using a standard set of fabrics.  Where I wrote shop substitute booth and you get the idea.  For several years I always  did the festival shop hop and I have completed a few of the quilts.  


Many years ago I did the shop hop, purchased a finishing kit from somebody, made all the blocks and quietly hid it away.


Yup, for some unknown reason I hid away a quilt top that was almost complete.


What was I thinking?


I have no idea what I was thinking but when it surfaced a couple of weeks ago, from a box of books to be discarded, I came across the pieces and decided to finish the year off with a completed UFO.


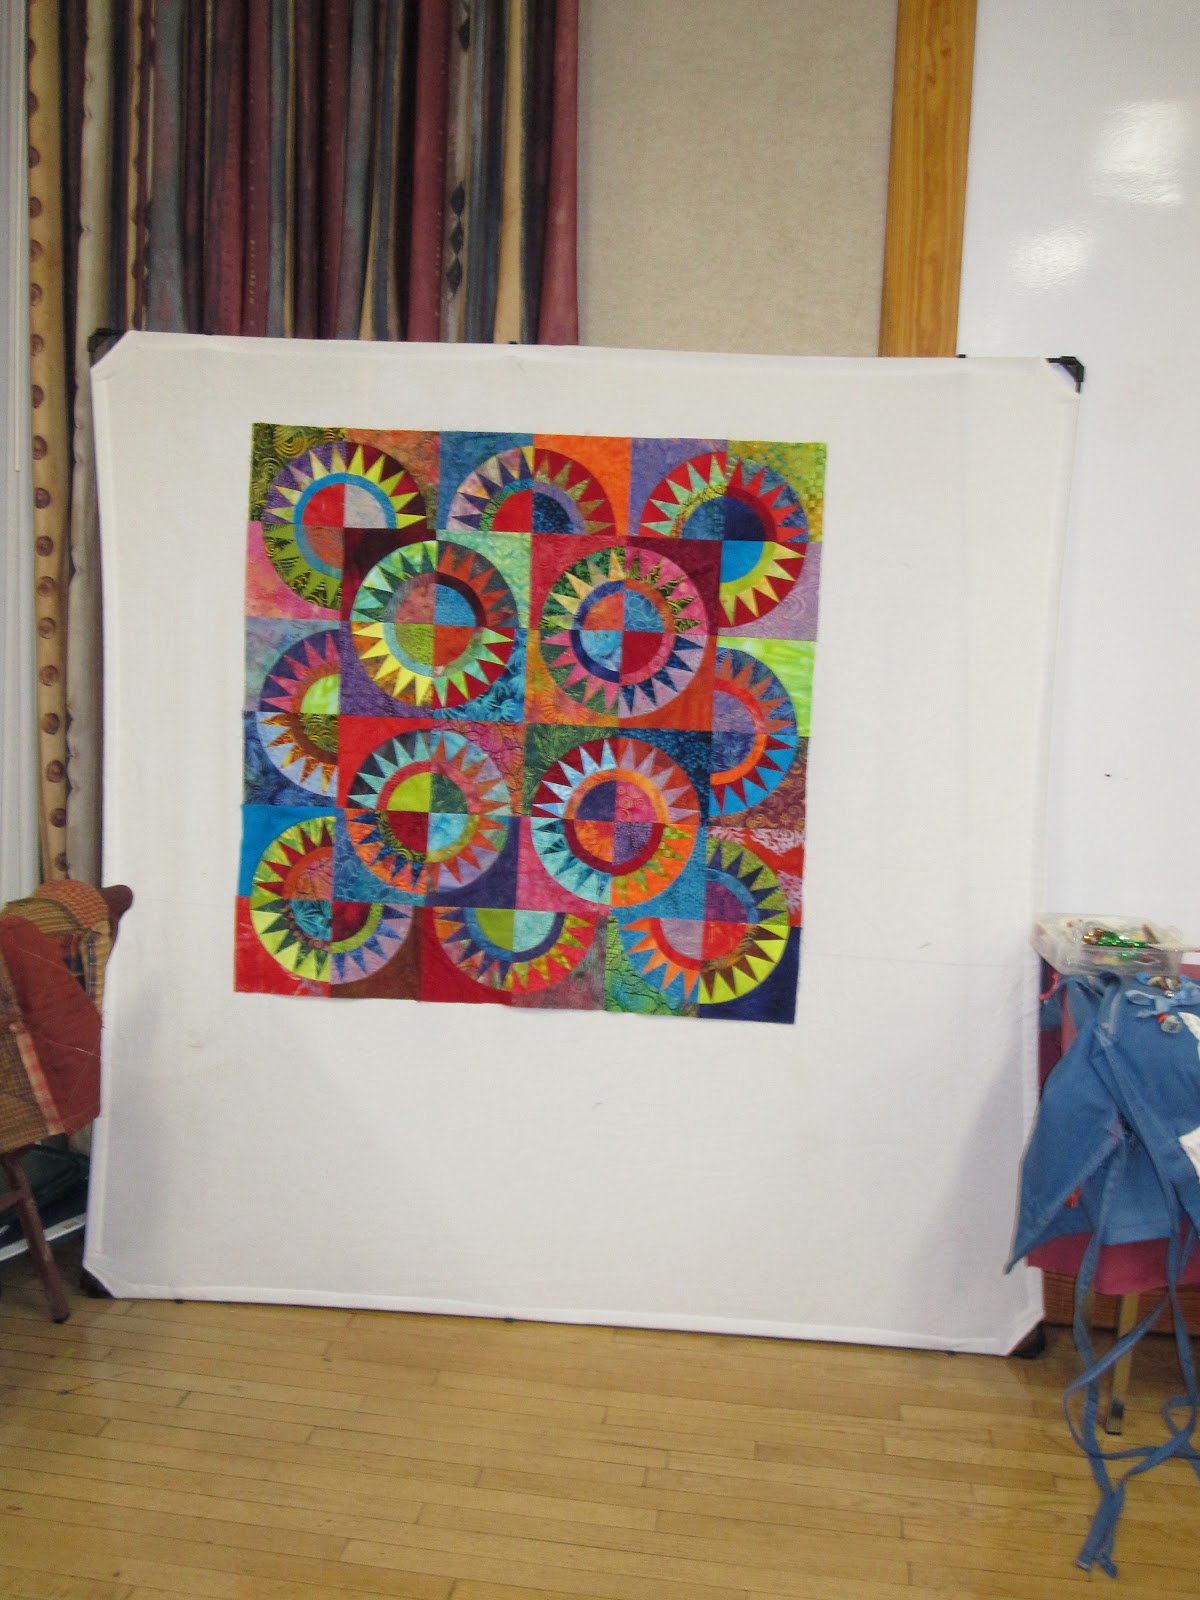
Yesterday I completed the quilt and here's what it looks like:


I like some of the blocks and others not so much...a danger with this kind of quilt making.  I had lost the instructions for the finishing kit so I finished it up on a wing and a prayer.  Some of the blocks did not exactly fit with the other blocks so I had to make some adjustments by adding additional borders and, in a couple of cases, I actually resewed the block to get it to the right size.


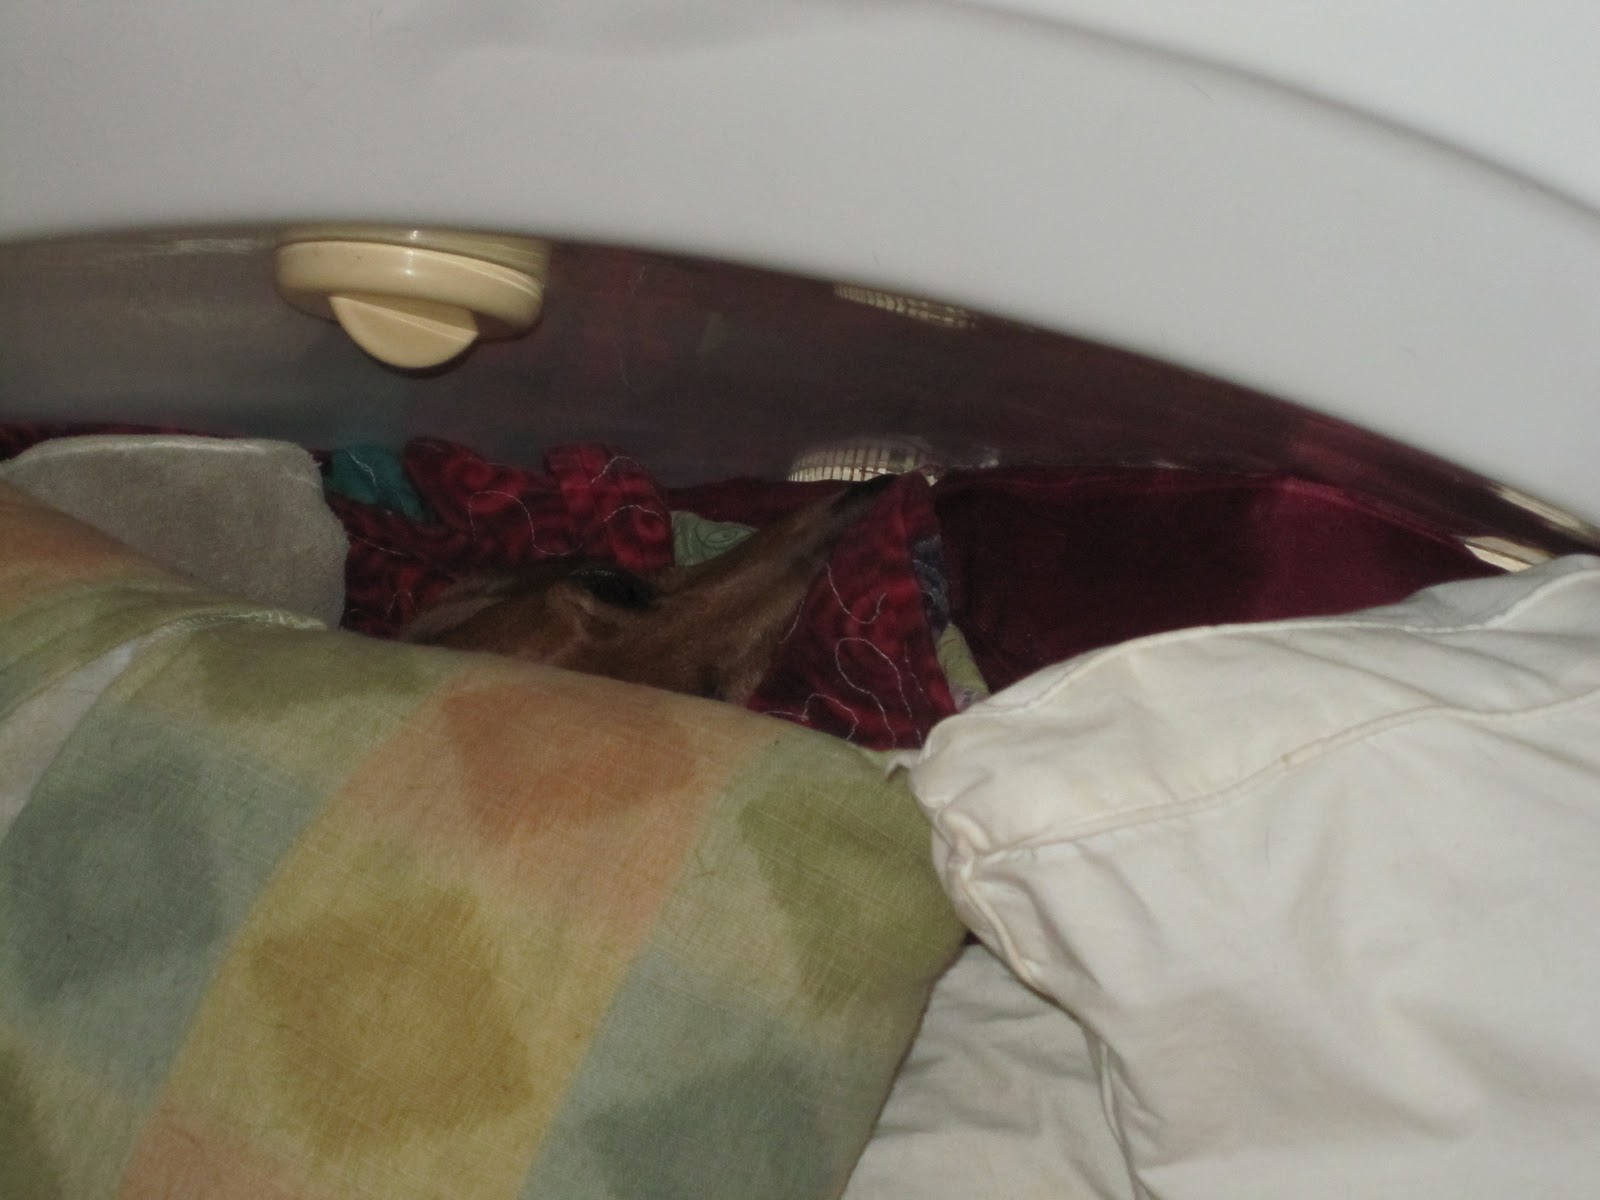
I like the size of about 68" x 88" as it is perfect for one human and two dachshunds cuddling on a lazy afternoon of mystery novel reading.  And, as Paul had absconded with a couple of quilts earlier this season, I needed to replenish my stock of cuddle quilts. 


Finishing off the year with a completed UFO is definitely a good thing.


Now on to working on my New Year's resolutions...or not!


Tuesday, December 27, 2011

Just in Time...

for the frosty mornings that are coming our way.


Yes, there are not that many when you live in Houston but there are enough that you do need some warm things to wear when walking the dogs in the morning.


My idea this year was to just stack on all the little scarves and shawls I have made lately under my quilted barn coat.   Not especially attractive but I figured it would do the trick.


Then I saw this scarf that the mighty Janetta made for her daughter in Texas A & M colors.  Then she started one in a cream, pink and lime green variegated sock yarn and I was hooked. 


The pattern is on Ravelry by a Canadian designer, Jane Richmond and is extremely inexpensive to buy.


I, on the other hand, did not buy the pattern, just read Janetta's copy, and proceeded to make a successful Rae Scarf.


Here is it wrapped around a youngish live oak in the backyard:


And here it is draped across the fence:


It came out to approximately 50" long and 12" wide at the widest point.  It's made out of Knit Picks Stroll Yarn in the color Summer Blooms Tonal.  This yarn is great to work with, extra long yardage for the weight and washes and drys up beautifully in the machines.  I had one problem with the yarn. About two thirds of the way through the scarf there was a knotted join in the yarn.  Normally that would not be a problem but at some point when I was weaving in ends I undid the knot and the scarf started to unravel!.  I tied it all back together with many, many knots  and many, many  curses.  Unless you are looking for the error, you would not find it.


Bring on the cold weather, I'm ready for you...even if the dogs are not.

Wednesday, December 7, 2011

Cheshire Cat Hand Warmer

While browsing the books at Jo-Ann's a couple of weeks ago I came across a book called 'Everything Alice'.  I picked it up, assuming it would be a book of patternless clothing (a la the Bog Coat), simple cooking (like donut pudding) and dachshund joy.


Imagine my surprise when I found it was a book based on Alice in Wonderland, a book I used to hate because of people calling me Alice In Wonderland when I was a child.


Hannah Read-Baldry and Christine Leech have created a book of over 50 projects to sew, glue, cut and bake in this delightful book subtitled 'The Wonderland Book of Makes and Bakes'.


To make it even better, the first project I saw when I cracked the cover was the Cheshire Cat Hand Warmer....the perfect project for someone who tries to get her dachshund companion to provide warming for her hands when the RA acts up.  Alex's butt may be the perfect size but he rarely will stay still long enough for any therapeutic effect.  A hand warmer is the perfect solution..


Here is the project as shown in the book:


Here is my simplified rendition:


Here is it being used by one achy hand:


Other projects I want to try are the Sugar and Spice Comfits, Lavender Cookies, Fabric covered Tea Pots and... well, just about everything!


For the Alice in Wonderland lovers out there and me.


Sunday, November 27, 2011

Lazy Bread


I don't do a lot of elaborate cooking especially after my failure with individual Beef Wellingtons last year.  When I do cook these days it tends to center on an Artisan style loaf of white bread.


Yup, that's me at 1:00AM covering a slice of still warm from the oven bread with unsalted butter and honey.


It seems that I can never start my day with fresh baked bread because my lack of time management skills means that these little feasts take place at very odd hours.

I call this Lazy Bread because it takes almost no skill or ability to make an excellent loaf of bread.

Yum, Yum!


Here's how I make my Lazy Bread:


Yield - one nice sized loaf


Ingredients:


3 cups of bread flour
1 1/2 cups of warm water
1 1/2 teaspoons of active dry yeast
1 1/2 teaspoons of sea salt


Method:


Mix all the ingredients into a cohesive ball in a large bowl.  Cover the bowl with plastic wrap and wait for a couple of hours for the lump to double in size.  Once doubled, put the whole thing into the refrigerator for about 10 hours.


Take the bowl from the refrigerator and scrap the dough onto a floured surface.  Sprinkle more flour over the top of the loaf push and pull the lump into a loaf shape by pulling the edges under the bottom of the loaf.  Remove to a parchment covered cookie sheet.


Cover lightly with a slightly damp towel and let the whole thing come to room temperature.  This can take over an hour so be patient.


Preheat the oven to 450o with a large shallow pan in the oven.


When the loaf has come to room temperature and the oven is ready, put the cookie sheet in the oven, quickly pour a cup of water into the preheated pan and quickly shut the oven door.


Bake for about 25 minutes, until it is a nice color.


Remove the loaf from the oven to a rack and let cool for at least 30 minutes.


Just before you can't stand it anymore, slice and enjoy. 


I store it in the microwave covered in plastic wrap for 3 - 4 days... if possible!


You can make a lot of additions and substitutions like using some whole wheat flour, or adding nuts, herbs and raisins but I usually don't bother.


There are a zillion recipes available on-line that I used to develop my lazy bread like Five minute bread, Artisan Bread Baking website and, the often intimidating, the Best Bread Recipe website.

Friday, November 25, 2011

Blue Jean Shawl

In my quest for accurately counting stitches while knitting lace I picked a very simple pattern from Tanis Fiber Arts called the 'Prism Shawl' for my next lace adventure.  It is available from Ravelry for free here.  It uses about 600 yards of sock weight yarn , hand dyed from the Araucanuia Yarns' Ranco Solid line and i happened to have a lot of it in aownderful blue to go with my blue jeans.. 


What attracted me to this pattern was its simplicity of construction until you get to the border.  With just stockinette, garter and eyelet rows randomly scattered through out the design this is a pattern I thought that even I could not mess up.


And, surprise, surprise I did not mess up the body too often.  Every once in a while  found I had dropped a stitch or not added a stitch when required but due to the lack of complexity I was able to fix these errors quickly and invisibly.


Then I got to the border.  About two rows into the border I accidentally pulled off about 30 stitches and realized that I would need to unravel a few rows to get back on track.  Off came a couple a couple of rows, on went the stitches back onto the needles..with an extra twenty on one side!


I don;t know how I did it but I ended up with more stitches on a row than I had originally.  Instead of more un-stitching I decided to go with what I had and make it work.


Here is how it came out:


What you don't see is that the center back point of the shawl has a large ruffle..which sits just above my tail bone!


Someone told me it is fashionable to have ruffles this year.


I may have messed up the final border but this is a great pattern for using up odds and ends of sock yarn.  Since I have a few hundred (thousand?) yards of leftover sock yarn, I think I will be using this pattern again for a more eclectic version.


PS - Guess who I found wondering around the house with this shawl in his mouth looking for a place to hide it?   

Saturday, November 12, 2011

Bad Quilts That Make Me Smile

Okay, so there aren't any bad quilts.  What can be bad about three layers of coziness put together by loving hands?  


There are badly made quilts and I seem to be an expert in making them.


I just looked over my past quilt postings and each one of them seems to have included words like 'mismatched corners', 'blunted points', 'discarded blocks that didn't fit' or some such confession of piecing disaster.  I have noticed that most of my backings have a wrinkle or three in them and sometimes the quilting looks like a dog's breakfast.


But in each and every case, the final results have made me smile.  Whether it is because I have no idea how it all got done, or the fabrics have disappeared, or the blocks are of many different sizes, or the borders were 'made' to fit or wrinkles were quilted to within an inch of their lives.  They have made happy.


My latest Bad Quilt began in 1998 and I just took it out of the dryer this morning after a marathon quilting session yesterday.  I originally posted about it here.  If you look at that posting you will see that I finished the top this March and it took about another eight months to get it quilted.


Here is how it now looks....


I decided that I could not quilt it in simple straight lines as there were so many mismatched corners.  In the end I did find a few straight lines to anchor it all and then I quilted circles at various points to hold it all together.  I like the way it looks and I had a lot of fun(?) seeing if I could make two circles the same size one right after the other.


I couldn't.


This quilt does make me smile because of all the missteps in getting it made but the best part is that my oldest UFO quilt is now done!!


And isn't that something to smile about?

Saturday, October 29, 2011

Picnic Quilt

Saturday Strippers has been having a lot of fun the past few months working through the book Scrap-Basket Sensations by Kim Bracket.  This is a fabulous book for using either Jelly rolls or your own fabrics that have been cut into 2 1/2" strips.  Kim has a great way of putting together coordinated fabrics, of which you have limited quantities, with a larger quantity of another fabric to make beautiful quilts.  Check out the link to Amazon.com where some of the quilts are shown from the book and you will see what I mean.


Back in August (!) the project for us was the Picnic Quilt.  I did not make a very large quilt but I think it will work for Sweet Sadie's.


What do you think?


The fabrics are a bunch of batiks that I won as a door prize some where, the white is from Sew Crafty's closing sale and the quilting (I know you can't really see it) is a meandering leaf pattern I made up as I went along. The size is about 42" by 31" which makes it a nice little accent for the spring.


What really pleases me about this quilt is that I thought my piecing of the blocks was a little off but it all came together when I joined them together.  The outside borders worked out in the end even though I didn't really think through the placement.  Instead I used up some leftover pieces that sort of bring the design to the more solid borders.  


Surprise, surprise....Poor planning on my part did not make an ugly quilt... or at least I don;t think it is ugly.


This is the second quilt that I took to the Quilt Guild Retreat to work on that weekend.  I might as well have not brought it as all I did was take it out the basket, shake it out, and put it back in the basket.  I still have one quilt that needs to be finished up from that weekend.  I pin basted it and started quilting it last weekend at Saturday Strippers and I really, really plan on finishing it up before the end of November.  With the Houston International Quilt Festival next week I don't think I will make much progress until later in the month.


It is a chilly day in Houston for late October and I have many windows open in the house.  The dogs are not happy about that and have spent most of the day cuddled under multiple quilts on their comfy chair.  I don't think they will like it when I scoot them off so I can vacuum up some of the dog hair from the chair.  Maybe I will bribe them with treats?  Chicken jerky or Greenies or both?

Monday, October 24, 2011

Busy, Busy, Busy Aprons

The project to make Busy Aprons for late stage Alzheimer's disease and dementia patients is almost over.  There are just a couple of more embellishments to attach to one or two aprons and a few more to deliver and this project will move off the books for a year or two.


I am so very happy to see this one finished.


It's not that I didn't enjoy making them but that, unlike the other charity projects I have worked on lately, this one required a lot of thought on the part of the maker to produce a useful product.


For instance, with wheel chair bags, there is a set size and construction process.  With as little as twenty minutes work you can produce a very good product that can be used by many.


The Busy Aprons do have a set size and basic construction technique but it takes about an hour to make a basic product and almost two to get all the embellishments chosen and securely affixed to the aprons.


In addition, this project seemed to spark the interest of a lot of people but, once again, my faithful crew did most of the work.  Mega kudos to the beautiful Susie, energetic Lish and generous Janetta for their many, many hours of help.  I must also thank the many people who contributed stuff for the aprons including many yards of fabric and trims plus buttons,beads, appliques and other bits and bobs..


In the end we have finished twelve aprons and I have enough 'stuff' to make at least a dozen more.  For now, the extras bits are going into storage for the Quilt Guild garage sale in about 18 months...unless someone wants to make more before then.  If they do, I will be able to help them along with pre-cut apron kits and lots and lots of embellishments.


Here's some of what we produced over the past few months:


Great example of a Busy Apron with lots of things to touch and feel while sitting.  Goal is to have at least seven different textures/things to play with on each apron.


Want to make your own Busy Apron for a friend or family member?  Basically you take an apron approximately 36" wide by 36" tall and add a lot of things to it that you think someone would enjoy touching.  That's all there is to it.


Some things to add to the apron include pockets, buttons, beads, zippers, shoe laces, ribbons, trims, odd bits of heavily textured fabric, bows, braids, small stuffed animals, appliques, sequins, pearls, faux keys, grommets, snaps, Velcro, lace and the list goes on and on and on.  We added a small whistle to each one just for fun.  They can be removed but I read somewhere that it was a good exercise for your lungs and mouth to blow a whistle.


Next up:  Baby Hats!

Wednesday, October 19, 2011

Heart and Home BOM Done!

Back in June of this year I wrote about finishing up this quilt top.  I put it on the pile of things that needed  to be quilted and, quite frankly, proceeded to forget about it.


Along came the KAQG retreat and, while trolling for things to bring with me, up popped this little quilt top.  Into the basket of things to do, while away, went this funny little quilt top along with safety pins for basting, black batting, black backing and binding fabric and black thread.  I even brought to retreat my sewing machine that does great quilting rather than my usual travel machine.


Piece of cake, right?


WRONG!


Once I started basting the quilt sandwich together all my negative feelings about this quilt came out with a vengeance.  My poor applique technique, my inability to center the central house block, the unevenness of the border fabrics and my inability to keep the instructions with the quilt pieces all came together to make me one grumpy girl.


Why should I put any time into making a quilt with such bad vibes?


Ever a Pollyanna, I decided to make this an exercise in improving my quilting technique.


I don't know if my quilting technique has gotten any better but this is how it all came out:


Since my hands have not been working very well I did not attempt to do any fancy feathers but I did add some fun things to the quilting.  In each of the blocks with the hearts I quilted in the names of dogs I have loved, my family members, cats I have tolerated, people that have lived with me who aren't family members and lots and lots of little hearts.


I am now in love with this quilt as, even though it is poorly made, it will bring a smile to my face when I see it and think about all the names memorialized in it.  Before it was done I was intending to give it to the dogs for their collection but now I think I may hang it on the wall where I can see it every time I go up the stairs to do some sewing just to remind me that a crappy quilt can be saved with just a little imagination.


And, just for some fun, this is how the bath tub/dogs' bed looks like when I go to wake the dogs up in the morning.
What?  No dogs!  Where did they go?  


This particular morning Alex finally poked out his nose from under all the pillows and quilts he prefers to sleep under to see if I was serious about getting them up for a run outside.  I had to go digging for Kelis as she wasn't ready to get active yet.


  With the cold weather coming, I hope you and yours are as cozy and warm as Alex and Kelis are very night.  If a quilt would make that happen for you, let me know.  I could always send you another of my crappy quilts....whenever I get the next one done.

Saturday, October 15, 2011

Not a 1,600" Quilt

There is a somewhat popular quilt pattern out there called the 1600 inch quilt.  Essentially you take one jelly roll of 40 different, 2 1/2" wide, 42" long, strips of fabric.  Sew them end to end, then fold in half and sew the long edges together.  Keep doing that and you will end up with a 48" x 64" quilt top.


Did I mention that you are supposed to sew the ends together at a 45 degree angle?


Here is a link that shows you the concept and even a video on the procedure.


Where am I going with this?


A young man I know is a new father and I would like to give him a quilt for his new baby girl.  The problem is that I don't have much of a stash of baby fabrics that I thought would work for a very girly quilt.


Along comes the ever creative Janetta who suggests that I make one of these 1600" quilts and she just happens to have a bunch of girly fabrics that would work for it.


Janetta came up with 10 fat quarters of coordinating pink/brown/cream prints and I was off to the races.


I ended up cutting about fifty 2 1/2" wide, 22" long strips of fabric for my quilt.


Yes, that does not add up to 1600 inches made up of 40 different fabrics but I figured it would all work out in the end.


Here is what I came up with:


It came out to 35" x 58" and I do intend to add a border or two of beige/brown/pink fabrics.


Did you notice that I did not sew the strips together on an angle but straight on?


This quilt, so far, has taken about two episodes of Criminal Minds (off the TiVo) to get it to this stage.


Another episode or two and I should have it bordered, basted, quilted and bound.


Not bad for a quick baby quilt.


Next time I will definitely angle the joins of the strips!   

Friday, October 14, 2011

Quilt Retreat 2011

Need I say more?
The beginning of a quilt by the retreat crew for our next auction....LOVE IT!


OMG!


A simple bright fabric center encased in simple borders...brilliant!

A clever husband drew out this quilt pattern on plywood.

Irish chain updated for Jelly Rolls

Check out those clever prairie points.

these colors will keep you awake

For our lone knitter

Sunbonnet Sue gone Hallowe'en.

Secret Sister gifts


Love this!

As declared by the maker...'One ugly charity quilt!'

Beautiful quilt... and look at all those cords!

Hundreds of safety pins!
Of course I can say more.


My own output was very slim for the weekend.  I did get most of a little quilt quilted (not shown above), cut fabric for a simple baby quilt, watched a couple of movies, played computer games, worked on my knitting and read most of a book on Brain Games for Your Dog but most of my weekend was spent just relaxing in a lovely location.  Camp Allen is just outside of Navasota, TX, home to W. C. Mercantile, a great little yarn shop, and three of us made a pilgrimage there on Saturday afternoon.


What I love about sewing retreats is the opportunity to get away from it all and do what I want when I want without concern for laundry, meals, or dog walking.  The fact that I can get some concentrated sewing time is just a bonus.


What I hate about sewing retreats is all that concentrated time with a small group of people.  I live alone with a couple of dogs and tend to do my own thing.  Imagine my surprise when I heard later that some of the attendees seemed to note how I spent my time.  I didn't notice what most of them were doing, just the results of their work.  


I've really got to get out more!


One thing I did do on my own was go in search of a screw for my sewing machine.  I ended  up in a small hardware store in Hempstead.  They sent me to a former sewing machine repair store in search of my screw.  I never found the screw but I did find a new member of my pack.


Meet Pierre:
He has settled into a spot in front of the fireplace and Alex and Kelis have accepted him as just an other odd thing in the house.  He has Alex's anatomy, Kelis's coloring and Kemora's face ...  all for a unique mix of Dachshund traits.


Would I go on another retreat...probably.  I have been on several corporate retreats which are very similar and several sewing ones in previous years.  2012 may be the year that I spend retreating....there is a knitting one coming up in February and one in April for the sewers and, of course another quilt guild retreat in September.  Now that I know the venue so well I will be able to take advantage of all it has to offer like hiking trails, a meditation labyrinth, and I might just make it onto a horse for trail ride.  Of course, Navasota deserves at least a few hours exploring it's unique shopping district.


It could be a great year! 

Tuesday, October 11, 2011

Red Scarf Project 2011

The Red Scarf Project is off and running for 2011 and I have actually completed one already.


What?


You don't know about the Red Scarf Project?


Begun by Foster Care to Success (formerly the Orphan Foundation of America) in 2005 when they collected 3,500 scarves to send to their clients on Valentine's Day.  The next year they collected and distributed 15,000!  The project keeps growing but so does the need.


I cannot imagine being 18 years old, with no family, being literally dropped on the street by your foster family and having to fend for yourself.


I cannot imagine trying to finish high school, find a home, shop for your own food and make all those life changing decisions that young adults make without any support from an adult.


I cannot imagine being a friend of a Knit at Night Guild member who was dropped form the program in the middle of their senior year  of high school who spent those critical last months of high school sleeping on friends' couches.  The KANG member related that this friend of hers received one of the Red Scarf Project scarves and how much it meant to him that someone he did not know would make something for him and send a word of encouragement.


I may not be able to imagine all these things but I can make a scarf, send a word of encouragement to some kid in these circumstances.


My first scarf, of what I hope will be several this year, is a simple 2 X 2 rib made from Knit Picks sport weight Stroll yarn in Holly Berry.  Here's how it turned out:


I used two skeins for the body of the scarf and some of a third ball for the fringe.  Excluding the fringe it is about five feet long.  The yarn was easy to work with but I was a little disappointed that there were so many joins in each skein.  There were at least eight in one of the balls and another 6 in the second ball.  In general, that should not be a problem but each join is a potential weak spot and I do worry that repeated washing could make for an unexpected unraveling... or maybe not.


Grab your knitting needles or crochet hooks, review that guidelines and make a scarf.  Heck, you might even learn a new stitch pattern or opt for the tried and true like I did.  In either case you could make a real difference in the life of someone you don't even know and what could be better than that?

Thursday, September 29, 2011

Quilt Across Texas Shop Hop - Part 2

As September began to wind down I realized that I did not have much time left to complete the Texas Shop Hop.  Heck, I had only visited one shop (Heavenly Threads in Trinity) of the 91 in the hop.


All became clear to me when a Saturday Strippers gathering was cancelled which meant I had approximately a day and a half all to myself.  Quickly I called Paul to let him know he was baby sitting Kelis for a couple of days and I contacted Alex's foster mom to see if a visit with Alex would fit into their plans.  Both Paul and Liz and Sid were agreeable so I packed the car that Thursday evening and, after water aerobics and Knitting on Friday, I hit the road for this new adventure.


A couple of things first - I had FIVE things to navigate by - a traditional Texas road map, the directions from the shop hop people, a download from Google maps, my GPS and my new phone's navigation application.  Despite all these instructions I got lost about twelve times and added about fifty useless miles tothe car.


But I digress..


My first destination was Lone Star Quiltworks in Bryan Texas.  I saw a lot of magnificent homes while getting lost trying to get there and my visit started on a funny note.  I charged into the store and asked for the restroom.  Knowing I was in distress the clerk pointed me to a lovely restroom with lots of decorations for children and reminders to wash my hands.  Imagine my embarrassment when I came out and realized that I was in children's toy/book store.  With a very red face I left and went into the correct store, just one slot over in the strip mall.


Lone Star is a large, well lit and well stocked quilt store.  They have a lot of patterns for accessories and lots of samples.  They also have great little gadgets and notions and I will admit I picked up a few Christmas presents.  One thing I noticed was their sale rack where everything was $4.00 a yard if you bought five yards or whatever was on the bolt.  I found a lovely floral border print in brown that would be great as a backing for a quilt or as a quilt border or cut up into a One Block Wonder type quilt.


After restocking my water bottle I hit the road again for Taylor Texas and E-Jay's Trunk.  This is a tiny store with a wonderful ambiance.  No pressure here!  I found a lovely piece of jacquard woven navy fabric of tiny school houses and stars that are the perfect weight for a house/sun dress or slouchy pajama style pants.  I ended up having a wonderful conversation with the owner of the store next door on the relative merits of crocheting versus knitting.  A great stop! 


It was getting late in the afternoon so I only made two more shops.  Both were sewing machine shops with a nod to quilting and other sewing activities.


Austin Sewing Machines in Round Rock was very hard to get to if you did not know the area.  They had a lot of fabric but, after using their restroom, I realized that there was nothing that caught my eye so I moved on.  Don't get me wrong, it is a big bright store and they had a lot of intriguing embroidery software but my brain just couldn't absorb any of it.  Sorry!


On to the Ready To Sew Bernina store in Cedar Park.  This store is in a very classy plaza and the parking lot was very full with people getting errands done before heading home for a quiet evening at home.  Tress in the parking lot always get my vote for ambiance.  When I walked in the store I was greeted with a comment from the owner 'You realize we are closing in ten minutes?".  Of course I didn't know you were closing in ten minutes because I am a brain dead shop hopper who has traveled almost two hundred miles today just to get to your wonderful shop.  I didn't stop for even ten minutes but got in, got my passport stamped and got out.


Back in the car I decided to call it a day and find where the next shop on my list was located and  to find a motel nearby so I could start early in the morning.  Ended up in an extended stay hotel for $39.99 (including taxes), didn't sleep well but enough that I know I won't stay there again!  Never found the Holiday Inn that was supposed to be in the area.


The rest will have to wait for another day.

Calais Shawl

In my unending desire to knit a piece of lace without five thousand miss-counts or dropped stitches, I searched on Ravelry for a free simple lace pattern...that is, one with very few pattern stitches and lots of simple repeats.  There are hundreds of free patterns that are easy but that is because most of them mostly straight knitting with a complex hem.  The Calais Scarf by Judy Marples of Purl Bumps fit the bill.  Here's the photo from her pattern: 


Isn't it lovely?  Many repeats of a small number of stitches (for those of us who can't count) plus an interesting border.  These attributes when combined with the use of only one skein of yarn made this a great project for me.


Off I went to the stash thinking of all those sock yarns I have acquired and how lovely they would look in this pattern.  While sorting through the pile I came across a skein that I actually hate and realized that it would work for this pattern.


I had purchased a skein of Araucania's Lonco Solid mercerized cotton yarn that had been hand dyed in chocolate brown.  I wear a lot of brown in the winter and thought that brown socks would be a logical choice for me HOWEVER this yarn has no stretch in it and would make lousy socks...or at least socks that would not stay up.  I had ignored good advice about always reading the label before you buy a yarn and had ended up with string for sock knitting.  YUCK!


Anyway, I have been hiding this yarn in the bottom of my basket and brought it out for this experiment in lace knitting.


Here's how my effort came out...


Yes, you can see a couple of boo boos and yes, on one row I couldn't figure out if I was knitting or purling but it's done, is incredibly soft and drapes beautifully.  This is definitely something I will wear as a decoration rather than for warmth and I love it.


Lessons learned/re-learned:

  • stitch markers are your friends
  • count twice, rip once
  • blocking wires are a good thing but finicky to use
  • nothing I own is big enough for blocking this type of project
  • there is no bad yarn, just yarn that hasn't met the right project yet

I think I will try this specific pattern again but in a traditional yarn (like a wool blend) rather than the string I used this time.


Time to go stash diving! 

Wednesday, September 21, 2011

Walker and Wheelchair Bags Distributed

Over the past couple of months I have been writing about the project to provide everyone in a local nursing home with wheelchair and walker bags.  The whole thing started off innocently enough with the beautiful Rose heading up a project for her church to improve the lives of the residents of the Pine Shadows nursing home.  Over the past few months it grew as members of the quilt guild and the church made about 100 of each kind of bag and today was the day that we distributed them.


Here is one of the new bags in use... and it works!


I also got a chance to view this wonderful quilt on a patient's bad...hand quilted too!


And check out this fabulous afghan-
But there didn't seem to be a lot of these homey touches on a lot of the beds. 


I don't think anyone was enthusiastic to visit the home but 14 of us gathered to bring over the bags and to visit with the residents.  


First of all, the smell of urine and/or feces was NOT present so one worry was alleviated.  Also, despite a whole range of disabilities of young and old patients, the staff seemed loving and caring and I didn't see anyone with soiled garments or dirty bedding.  Another worry alleviated.  The final worry was about those who really can't look after themselves at all.  All the residents seemed seemed well cared for and their needs acknowledged and tended to quickly.


But here's the thing... no matter how nice a facility is or how healthy the patients could be, this is still a nursing home where most of the residents will leave when they die.  Families and friends visit rarely, if at all, and boredom is only somewhat alleviated by meals and light rehab activities.  Its depressing and not where anyone would like to be.  With 75% of the Medicaid budget going to these types of facilities I wonder how the level of care might deteriorate if certain politicians have their way.


BUT I am glad I went and that this project is over with for now.  I have  a feeling we will be making more as time goes on but not so many all at once.  I don't think I'll have all the energy I needed to get this project completed until next summer.