Thursday, June 27, 2013

Triangle Bag

Somewhere out there there is a leather handbag, lined with an exterior pocket and magnetic closure.  It is a great looking but simple bag and is produced by Maison Martin Mergiela. 

Go take a look at it here, I'll wait for you.

Fast forward several months, maybe years, and a sewer got a hold of the design and simplified it.  They produced a stunned looking canvas bag with a leather handle made out of cotton canvas.  It is not as fancy as the original bag but it is doable by the home sewer looking for a unique accessory.  A tutorial was produced and I had to try it.  My results were not as elegant but satisfactory.  I have used it a lot as a knitting bag and I am happy with that use. 

Here is the tutorial I used.

Then the other day, I saw, on Mark Lapinski's Facebook page, that someone else had come up with another tutorial for this bag...this time called the Origami Tote Bag.  it is a great tutorial but it essentially repeats the original one that I had used. The fancier tutorial is here and it inspired me to try this bag again.

Here is my latest effort:

It is looking a little bulky because I stuffed it with a quilt I just finished.

The fabric is heavy weight cotton, (almost canvas but not) that I purchased on a bolt from Danny Nyguyen's fabirc sale last week.  I like the polka dots and the heftiness of the fabric.  Doesn't it just cry out for some Zentangling or other little drawings in the circles?  I already have another bag that I color, when I remember to take markers with me, on long appointments so this a natural for me.

My bag turned out to hang about 22", about 15" across at the bottom and I boxed the bottom so it is about 4" deep.  I don't think that matches exactly the original bag but it's pretty darn close..

BUT I so would like one of the original bags just to have and use...and to figure out how they do the exterior zippered pocket and the actual sizes.

That will be for another day.

Monday, June 10, 2013

Coffee Breeze

I just finished another top from the Saturday Strippers group.  I think it is the first time I have actually finished the project, in the stated size, before a new project starts.  The project is from this book and is called Summer Breeze by Kim Brackett.  Except for one quilt, all of the projects in her books are easy to put together and are designed to use just one Jelly Roll and some background fabric.  Kim is great designer and writes great instructions.

( a Jelly roll is a collection of 21/2" by Width Of Fabric (WOF) strips of coordinating fabric sold by the manufacturer to quilt stores for fabric junkies like myself)

Here is my rendition of Summer Breeze:

The fabric I used was from a Jelly Roll by Timeless Treasures' Tonga batiks called something like Coffee Break.  The background fabric is a fake batik of gold, beige and pink.  I think it went together well, and, since my colors were not summery, I have called my quilt top Coffee Breeze.

I did make one adjustment to the pattern in that I used only one border and not two as shown in the pattern.  The reason for this is that I did not cut my fabrics efficiently and ended up with a lot of little bits that would have been a pain to piece for a border...so I didn't.

I love the top....about 60" by 44"...and I learned a lot about my piecing style during this process.  I noticed during our session that each person has a very distinct style for putting a quilt together when there is a clear plan from the designer. 

Some people cut out all the fabric required then piece each little bit separately.  For instance, in this quilt that meant making all the pinwheels first, then bordering each pinwheel, then making the striped blocks then sewing the pinwheel blocks to the striped blocks.  Then assembling each row then sewing each row together then adding the borders.  All of this activity is interspersed with many stops to iron their work and square up any anomalies.

My style is cut out some of the fabric, make a few blocks (usually about four), putting those four together, admiring my progress then repeating that until I have it ready for borders.  I finger press only when I need to and squaring up only occurs by ripping out the errant stitches and resewing.

I'm not sure which is the more effcient method but there is no difference in the outcome.

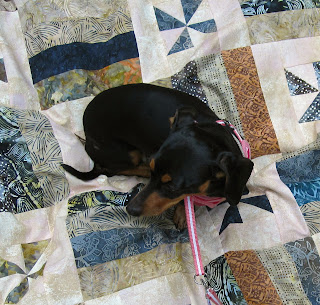
Kelis approves of my efforts and I can't ask for much more than that.