Wednesday, September 21, 2011

Walker and Wheelchair Bags Distributed

Over the past couple of months I have been writing about the project to provide everyone in a local nursing home with wheelchair and walker bags.  The whole thing started off innocently enough with the beautiful Rose heading up a project for her church to improve the lives of the residents of the Pine Shadows nursing home.  Over the past few months it grew as members of the quilt guild and the church made about 100 of each kind of bag and today was the day that we distributed them.


Here is one of the new bags in use... and it works!


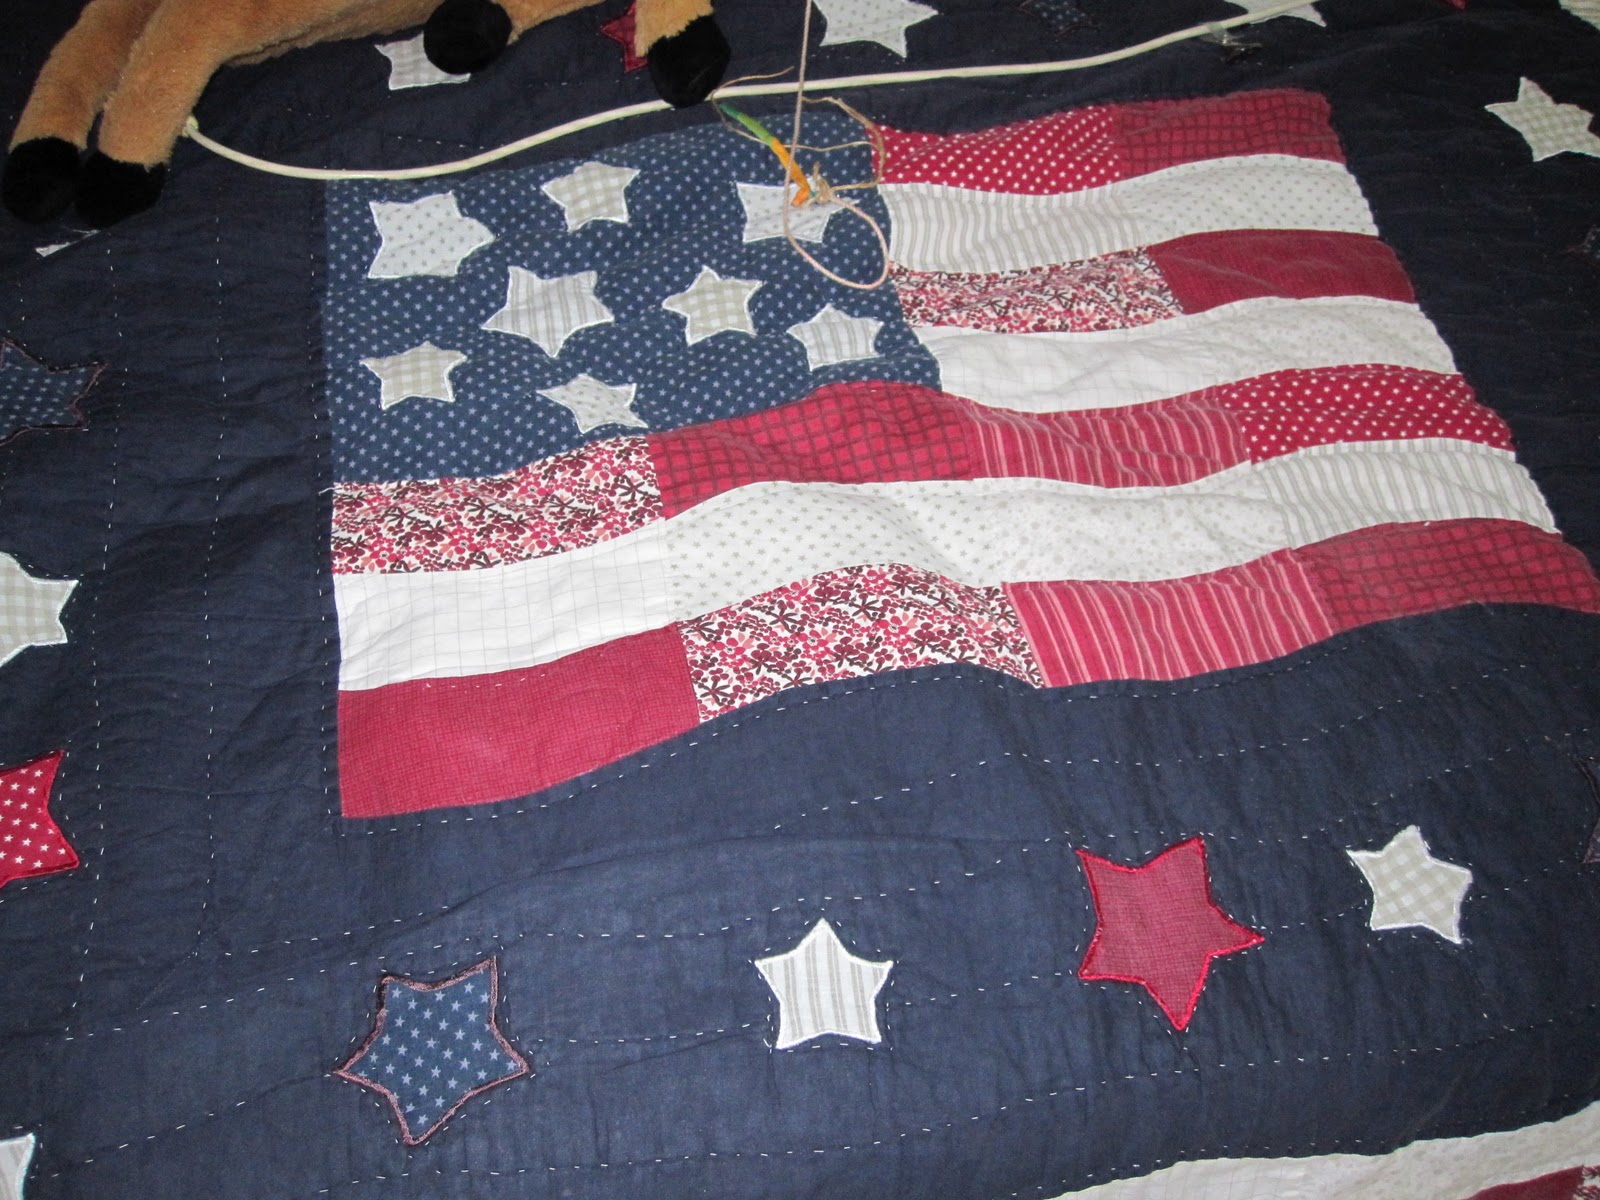
I also got a chance to view this wonderful quilt on a patient's bad...hand quilted too!


And check out this fabulous afghan-
But there didn't seem to be a lot of these homey touches on a lot of the beds. 


I don't think anyone was enthusiastic to visit the home but 14 of us gathered to bring over the bags and to visit with the residents.  


First of all, the smell of urine and/or feces was NOT present so one worry was alleviated.  Also, despite a whole range of disabilities of young and old patients, the staff seemed loving and caring and I didn't see anyone with soiled garments or dirty bedding.  Another worry alleviated.  The final worry was about those who really can't look after themselves at all.  All the residents seemed seemed well cared for and their needs acknowledged and tended to quickly.


But here's the thing... no matter how nice a facility is or how healthy the patients could be, this is still a nursing home where most of the residents will leave when they die.  Families and friends visit rarely, if at all, and boredom is only somewhat alleviated by meals and light rehab activities.  Its depressing and not where anyone would like to be.  With 75% of the Medicaid budget going to these types of facilities I wonder how the level of care might deteriorate if certain politicians have their way.


BUT I am glad I went and that this project is over with for now.  I have  a feeling we will be making more as time goes on but not so many all at once.  I don't think I'll have all the energy I needed to get this project completed until next summer. 

Wednesday, September 14, 2011

Make Your Own Dress Form

Several years ago, Connie Crawford came to the Houston Chapter of the American Sewing Guild to lead a pants pattern class and a dress form making class during a sewing retreat weekend.  Due to some amazingly weird problems... like the venue declaring bankruptcy 72 hours before we were to meet and over 100 attendees working with only a 1' x 3' of space each, the pants pattern making took up the whole weekend so the dress form making was postponed for a few months.


Dress form making is all the rage with many online seamstresses but if my experience is typical, it would be better to save your pennies and buy a pre-made dress form.


For example, your partner who is doing the wrapping needs to be very strong to lay on the layers of tape snugly and consistently.  If the taping is not uniformly snug, your final product could be very lopsided.


Secondly, do not gain or lose significant amounts of weight after your dress form is made...unless you want to go through it all again.


Thirdly, be prepared to stand perfectly still for at least one hour for the taping to occur.  I think I was required to be still for over an hour (more like two) and, by the end was feeling faint and parts of my body fell asleep.


Fourthly, at least four layers of tape are required to make an adequate form, three on the body and at least one more after it is cut off you.  In all I think mine ended up with six layers including one on the inside to firm up weak spots like the waist and where the cutting was done.


And another thing...the form needs to be stuffed after you are done.  Stuffing is hard to find and can be expensive.  For a dress form that you can stick pins into you need many pounds of cotton wadding..not batting as for quilts but loose cotton fill...and you must fill the form very firmly.  At the time it was very hard to find the filling locally and mine was never filled.


Why am I going on like this about an old project?


Well, my dress form has been sitting around the house since it was made.  It was int he dining room for a while, then the sewing room and it finally ended up in the back of a closet.  In one of my rare moments of cleaning, I pulled it out the a couple of weeks ago and sat it up on the bathroom counter.  I thought if I saw it often enough I would be motivated to finish the dang thing.


After much thought I tossed it out in this week's garbage.


After all the time, effort and money spent on this dress form would I toss it away?


Let me count the ways....

  1. I have lost weight since then so it is too big.
  2. Although the dress form has a sway back, I do not.
  3. One breast was wrapped as a double A while the other looks like a triple E.
  4. I have a small butt, and have never had much of one, but my dress form had none at all....completely flat.
  5. More financial investment in this project seemed stupid.
  6. Frankly, I didn't like Connie or her attitude and just seeing that dress form on the bathroom counter brought back all the bad feelings I have of the whole experience. 

So there it is on the side of the road waiting to be picked up and sacrificed to the landfill gods.


Rest in peace!


If you really want a dress form just buy one online.  I can't for the life of me remember who sold me mine but the basic form came from Paris, there were three covers for it and around 20 little foam bits to made adjustments to more properly match your shape and it has a lovely oak stand.  It may have come from Fabulous Fit.  I do not see my model on their website and it was certainly less expensive than I see there now, but it is still the best way for me to how a garment will look on me.

Thursday, September 8, 2011

Quilt Across Texas Shop Hop - Part 1

Those wonderful folks in Quitman, TX at Stitchin' Heaven have come up with a great way to force traffic into a lot of quilt stores in Texas.  They have created a shop hop of about 90 stores, in eight different regions spanning the whole state of Texas and we quilters have a whole month (THIS MONTH!) to visit as many as we want or can for a chance at some pretty spectacular prizes.   Called the Quilt Across Texas shop hop it gives people like me an opportunity to see different shops, explore the back roads of Texas and to find unique quilt related items that are not available through the big distributors while hoping for a big prize.


Today is the day that I started my adventure.  There was a little method to my madness.


First of all, I wanted to see how Alex and Kelis would handle a long car ride.  The shop I went to today was 75 miles away which seemed like a good test of their ability to tolerate my ignoring them as the miles flew by.  


Kelis handled it like a pro.  She spent most of the trip sleeping in the back seat on an old wool afghan.  Good Girl!


Alex, on the other hand, spent most of the trip whining and trying to get between my face and the wind shield.  When he wasn't in the front of the car driving me nuts he was laying on the shelf behind the back seat with his head wedged between the head rests looking for to all the world as a dog getting ready to heave up his breakfast onto the the back seat.  


Maybe I'll try drugs on him next time.


The shop I visited made all the Alex drama worth it.  Heavenly Threads Quilt Shop is a delightful little store in Trinity Texas with a sweet owner and a Chuweiny(?) named Lucy as the shop dog.  Lucy got to meet Alex and Kelis and really didn't know what to do with them.  Alex made several attempts to sniff her in her nether regions so no wonder she wasn't interested!


The shop is in an old house, well signed and contains many things for the quilter including several civil war themed prints, embellishments for art quilts and a broad range of fabrics.  Patricia, the owner, recently published her first pattern which combines an appliqued cowboy boot with blue jeans into a nice wall hanging.  It's not on the website but you can see mine if ask nicely.


My hear sung a little when I saw her backing ready bolts of fabric for 50% off and her pillowcase kits for $5.00 each.  I have enough backing fabric for a small quilt factory but the pillowcase kits will be used almost immediately for a project I saw on Facebook.  Country Living Quilts (1816 CR 427, Marquez, TX 77865) is collecting pillowcases for those who have been burned out of their homes due to the huge wild fires around Bastrop, Texas.


 If I am ever near this area again, I will definitely stop in and enjoy all the quilt goodness here.


And that's the other method to my madness.  This shop is WAY off the beaten track for the shop hop.  When I mapped out everything else in that region, all of the other shops are concentrated between Houston and Austin except this one.  Making it to that shop while doing the other shops would be a bit of a pain so doing it by itself made sense to me.  


I also got to enjoy some very pleasant back roads.  I drove up to the shop through a lot of construction on I-45 but came back on a lot of country roads so I could stop and have lunch at Florida's Kitchen in Livingston. Yum, Yum!


I love back roads in any part of the world and today was no exception.  For a while I followed an old boat trailer with a skiff on it.  The trailer had weeds growing on it and the boat lost little bits of itself as we bumped along the road. I wonder what they were going to do with such an unseaworthy vessel after they left the road at a public boat launch?  They may have been thinking about sinking it in the lake, but the drought had made the lakes so shallow that I don't think they would have been successful.


I saw no evidence of wild fires in the area (a good thing!) but I did get to see how low some of the lakes and streams are in this area.  At one point there was an ugly stench coming through the air vents. Before I panicked I realized that the smell came from rotting vegetation exposed by the dropping lake levels.  Glad I don't have a home near there! 


The next part of hop that I will attempt may include an overnight stay somewhere as the distances are pretty significant...especially if I want to loiter at any of the stores.  Kelis will go to Paul and Alex has been offered a place at his foster family's home.  I just have to get the planning done so I can firm up the dates.


If you are in Texas check out some of the stores you have never visited before for a road trip treat.  If you are out of state...see if you can get one going in your state.  Shopping, back roads and unique quilt related stuff will make it all worth the energy to make it happen. 

Tuesday, August 30, 2011

Fat Socks

Way back when I was a lot younger and more athletic I would go skiing with my family.  One of the best things about skiing was that afterwards I could take my ski boots off and put my poor tired feet into something big and sloppy.  Apres ski boots were never in my wardrobe but over sized socks worked for me.


Flash forward more years than I care to count, and I now live in Houston which is many hours of hard driving from any ski slopes.  The only thing that remains is that in the winter my feet get cold and tired and that walking on cold tile floors does not make them feel any better. 


House slippers are okay but want I really want are over sized, sloppy wool socks.  Try to find ill fitting scratchy socks in the stores and they will ship you off to the funny farm.


Enter the Twisted Yarns sale bins.  A couple of months ago I spotted two large balls of something called Classic Worsted Tapestry yarn from Universal Yarns.  The color I found was China Blue which is wonderful mix of blues, creams and golden yellow.  With my imagination running wild, I bought two balls and decided to make bulky socks using one ball per foot.


After a few weeks this is how they came out:


Yes, they are big over sized wool socks but they look pretty awful with that lazy squared off toe.


Light bulb moment...why not felt them? They would still be bulky wool socks but maybe they would look a little better.


Into the washing machine and dryer they went and this is how they came out:


Not very different from the before picture!


What was going on here....


It turns out that your intrepid knitter had not read the label on the skeins of yarn.  Classic Worsted Tapestry is not a 100% wool yarn.  I had imagined that.  It is really a 75% acrylic yarn with 25% wool thrown into make you think it is really wool..BUT IT IS NOT! 


I still love my socks and their over sized scratchiness but I have learned a big lesson here:


READ THE LABEL... not just the name of the yarn BUT THE WHOLE LABEL!  Read it once when buying the yarn, again when you get it home and again when you are considering what to do with it.


Then you might not be in the position I will be in when I show them at the knitting guild meetings this month where I will have to confess that I cannot read and that yarn with any acrylic in it will not felt.


I think I am now ready for winter...sloppy house socks, small shawls/scarves and ear warmers.  If I get down to really knitting I will even finish the sweater I started two years ago for the complete homemade look.


OR maybe I should try mittens before I finish that sweater?

Sunday, August 28, 2011

Cold Nights, Warm Ears

Well, we haven't had any cold nights yet...unless you count the 80F we had the other night, down from 100F during the day.


Anyway, Knitters North of Town (KNOT) of the Knit at Night Gang (KANG) had a great program the other night to create a cute ear warmer headband with a little flower on it. Mabel agreed that it would be a great addition to her winter wardrobe so, after many false starts, here she is in her new ear warmer:


Pretty cute, yes?


This was created from a class pattern that the wonderful Marilee had and that many of us wanted to learn about.  The pattern is unpublished but if you ask nicely I'll see what I can do about getting you a copy.  UPDATE:  Here is a similar pattern I found...looks the same except that this pattern makes a wider headband of 33 stitches instead of the 19 I used.


This ear warmer is made out of chunky yarn on US size 11 needles.  I used Berroco Ultra Alpaca (won as a door prize that evening!) in a lovely heathered blue to make Mabel's ear warmer.  I worried about the increases and decreases being too prominent with such thick yarn but the stitch changes are all hidden within the 1x1 rib pattern.  I did have some trouble keeping straight which was the right side so ended up with some huge markers to remind me that the right side was not the wrong side.  The flower is a somewhat free form piece of crochet with a knitted bobble in the center.


I so enjoyed my adventure with this pattern that I have started another one.  I think my second one will go to the church that provides KNOT with space FOR FREE!  With the high temperatures that we have been dealing with here, their generosity is very much appreciated.


I also want to let the world know how generous the KNOT group is with their excess yarn and needles.  Thursday night I collected enough yarn and needles from this group to over fill a huge plastic bin.  Their donations were made for the middle school knitting program that  I hope will be restarting soon.  Some of it will be going to a group locally that knits hats for chemotherapy patients.  One little bit of it went onto my needles and became another ear warmer for Mabel.


The yarn was very chunky, almost like roving, and I wanted to see what it was like to work.  I kept knitting in garter stitch until there was none left, at which point I realized that it was just the right size to warm Mabel's ears.


Good thing Mabel is generous with her hats as I really do need ear warmers when I walk the dogs in the colder weather.  Of course, it feels like we won't ever have cold weather again but I have faith that the weather gods will screw with my expectations of a couple of months without air conditioning or heating bills.


Now back to watching Irene's progress up the coast.  Stay safe and dry!

Friday, August 12, 2011

Lace #2

I decided to try another lace project because the first one proved I really don't know how to count stitches.  If you don't remember that effort, check here.


For  my second try I decided to use a pattern that someone had copied for me.  It's called a Larch Scarf and looked slightly lacy without becoming dreary.  The pattern is here along with the notes by the designer.


The notes by the designer proved to be incredibly important for a lace newbie like myself as they included some very important information.  If you not a knitter you can skip this part but for the knitters out there the notes included such vital information as the symbol chart and that the whole scarf is in garter stitch.  These two pieces of information, if they had been in the pattern, may have resulted in a better looking scarf for me.


However, I think it looks pretty good and, at 52"wide and 22" deep, it will make a nice little triangular scarf to tuck around my neck when it gets a little cooler here.


The yarn used is called Stroll from the online retailer Knit Picks.  It's a super wash wool blend and the color I used was Queen Anne.  I originally got this yarn in a kit from Knit Picks for six different pairs of socks with cable detailing.  I never made one pair from the pattern book but i will be using the yarn for non-cable socks and, maybe, more lace knitting adventures.


As always, there were lessons learned (again!) in doing this project.

  • Free/self-published patterns have not been vetted by a bunch of testers.  Not that retail patterns are always better (see the errata for 100 One Skein Wonders as an example) but the pattern I used could have had better documentation and less gushing over the pattern.
  • I really can't count stitches without lots of markers.  My final count was about 30 though only about 25 made it back into my box of stitch markers.
  • A more solid looking color did give better results however 476 yards of yarn do not give you a shawl, just a scarf.
  • Cable needles are a blessing and a curse.  They make large projects like this easier to work but my cable never really relaxed enough for it to be pliable.  I have heard that if you soak them in some warm water before casting on you can soften up the nylon cables but I will need to try it before endorsing that method.
Alex and Kelis were so excited that I had finished this project that they wanted to join in the fun of photographing it in my front yard....without their leashes!


Fat chance guys!     

Wednesday, August 3, 2011

Busy, Busy, Busy

Some of us are dealing with friends and family with Dementia and Alzheimer's Disease.  Some of us will be victims later in our lives.  Some of us remember the first time they saw a friend cry because her husband kept playing with his zipper.  And some of just want to help both the patients and caregivers to make their lives a little better.

One of the side effects of these diseases is described as busy hands.  Fiddling with a zipper, buttons, pockets, shoe laces, towels etc. etc. etc.

To help keep busy hands busy and to help the patients with a sense of accomplishment someone came up with the brilliant idea of creating Busy Aprons.  Essentially a busy apron is a butcher's style apron that has been embellished with simple activities and interesting textures.

It will be the next activity for the once Upon a Time Bee and I made up a sample the other night.  Here is what I came up with:

On my apron I included chunky buttons, a Velcro key tab, a key ring, a tassel, a sideways pocket, a pocket held together by a ribbon bow, a big pocket, a bit of toweling, a chunky zipper with a ribbon pull tab, all with rick rack and other trims for more texture.  I have space to add more things but for now I'm calling it done.

Other things I could have included were:  shoe laces pulled through shoe grommets for lacing, a see through pocket for family photos, a key to something innocuous like a treasure box, big beads and cording for stringing, a soft toy tethered to a pocket, pompoms, ruffles, pockets for washable markers and a coloring book, laminated family pictures to dangle from a key ring, beads and sequins, all kinds of trims, a bow tie or regular tie to tie, cords/yarn to braid ... I think you get the idea. 

Several web sites have more information on practical solutions to busy hands.  Here are some that focus on Busy Aprons - 
Time to get busy... after I turn off the soaker hoses which may have flooded my yard by now!
  

Sunday, July 24, 2011

Lace #1

A couple of months ago I was admiring a lacy shawl knit by a friend.  It was white, slightly fluffy and thoroughly delicious looking.  I came home and looked up lace knitting on Ravelry and saw many beautiful examples of lacy shawls and thought I could make that!


As in all new projects, my enthusiasm was a tad more than my skill or ability but charge ahead I did.


First I needed to select a yarn.  I had a skein of fingering weight yarn from Schaefer Yarn in the Aung San Sui Kyi color... a luscious colorway of peach, green and blue in 50% merino wool and 50% silk called Audrey.  I had intended this yarn for some special socks but a lacy shawl seemed like a better project for this yarn.


Secondly I needed to find a pattern.  Since I had 700 yards of Audrey I figured I would have a lot of choices.  WRONG!  It seemed that most of what I liked either required thousands of yards for a body covering shawl or only about 400 yards for a little neck cover.  I needed something in between and ended up selecting a free pattern on Ravelry called Ethereal Shawl and originally published on the Patterns From my Head blog.  There were options included in the pattern for using more or less yarn than the original.  The best part about this pattern is that it has been tested and the pattern updated several times so any errors/discrepancies in the original pattern have been solved.


I printed off a couple of copies of the pattern, sat down with my needles and cast on assuming I would be finished in a couple of days.  Almost a week later I was still casting as I ripped out the first few rows about 20 times before I got into the rythym of the pattern.  As I continued to knit I found that I had a lot of trouble counting my pattern stitches, keeping my place in the pattern and at about 75% complete I found that I had dropped a sticth or two way down int he middle of the pattern.


Here's how it turned out:


Here's where I dropped a stitch or two.  Still don't know how I going to fix it but I will...even if it means just threading the loose stitches on a piece of yarn and tying it off in a big honking knot!
I am not unhappy with the result as it fits around my shoulders and is light enough to not be oppressive but heavy enough to provide some protection against air conditioning.


There are a lot of lessons learned in this project.

  • Have lots and lots of stitch markers when doing doing multiple repeats of the same pattern in a row.  I used over 20 per row by the end, and although it looked like it was raining stitch markers every time I stood up, they made a huge difference in keeping track of the pattern.  I did not learn this until about 30 rows from the end.
  • Count every pattern repeat and every row at least twice.  Just because you got the right answer on the first count, count again just to be sure.
  • A variegated yarn like I used is beautiful and hides flaws but a solid yarn would have highlighted the pattern better.
  • Stitch markers are not all alike.  Those made out of rings with a little space for opening them up love to catch extra yarn especially when using such fine yarn.  Look for stitch markers when the ring does not have a little gap in the ring.  This is not a good marker...see the little gap in the ring?  While these and these look great.  Most of my stitch markers have the split so i was not a happen camper.
  • Make many copies of the pattern you are using.  I ended up destroying three copies with my notes and marks.  I still have one copy in pristine condition so I can always try this again. 
  • Use the recommended size of needles.  Do not assume you know better, you probably don't.
Well, that's it for my adventure in lace knitting.  I may try it again as I have found several more lace patterns in my books that look beautiful and, if I remember my lessons learned, could definitely be done by the colder weather. 
  

Sunday, July 17, 2011

Helical Knitting

In my continuing quest of being a know-it-all, when it comes to everything, I took a class yesterday with the Knit At Night Guild (KANG) on helical knitting with Kenny Chua at Park Avenue Yarns in League City.

First off I was late in arriving.  I misread my GPS and would have ended up in Galveston Bay if I had continued on the right road for way too long.  The shop looked wonderful but the parking for such a large class (about 20 of us) was inadequate.  I ended up parking in a puddle on the side of the road and did a very graceful leap out of the car.  

Yes, we had some rain (Yeah!) so puddles were to be expected.  My inexperience with this phenomenon meant I wasn't watching where I parked.  Lesson re-learned!

Kenny is a young chemical engineer by day and a wonderful knitter by night.  He has had patterns published in several mass media magazines like  Knit Simple, Knitter's Magazine and Interweave Knits.  He is a good teacher but seemed uncomfortable up there when, I think, almost everyone in the room was older than him.  I hope he keeps at it as he is very knowledgeable with a delightful sense of humor.

Helical Knitting is a response to those of us who knit striped garments and accessories in the round.  Instead of knitting back and forth on two needles, knitting in the round means you are always knitting in one direction, usually on needles joined with a cord.  

Knitting traditionally (back and forth on two needles) does not have a problem with stripes.  You want to join colors, wait until the end of the row, tie on a new color, cut off the old color and continue knitting.

Knitting in the round does not give an opportunity for a hard stop as the end of the row never happens until the end of the item.  Striped items usually end up with a jog in the stripes, setting you up for an unattractive indication of where you changed colors.

Helical knitting is a response to that difficulty.  Essentially you knit the different colors so it looks like you are knitting in a spiral.  Since you are only knitting a single row of color per stripe the colors spiral up the item being knitted without a bunch of joins and without the slope implied by knitting in a spiral.

It really is a very clever way to knit a striped item and I encourage you to check out Kenny's website for some beautiful examples of helical knitting.

Here is my output from the class:

The only place where you can see a join is just where you join the colors to the base brim.  Here its the addition of the yellow to the rust at the top of picture.

Otherwise the changes in the colors is completely invisible.

We were using Berroco Comfort worsted weight yarn in four colors.  Although I am not in love with this yarn, it really is relatively easy to work with and is completely machine washable and dryable.

How do you accomplish this miracle of knitting stripes without a join?  Here is a website with some very technical instructions and another site with a different approach.

If you just want to dive in and give it try here are a couple of things to think about:
  • Number of colors - not more than six, 
  • Number of stitches - the more the merrier.  We worked on a 105 stitches to a row hat.
  • Stripes cannot be taller than one row for it all to work.
Here is a basic explanation on how to do it:
  1. Start with a base - in this case we used a 1 x 1 rib on needles two sizes smaller than the needles used for the body of the hat.  We used 98 stitches for the ribbing on US size 6 needles.       
  2. Optional - increase the ribbing stitches from 98 to 105 in a plain stockinette knit row.
  3. Divide the number of stitches in a row into four equal amounts if you are using four colors.  In our case we divided the 105 stitches into three sections of 26 stitches and one of 27 stitches.
  4. With the same yarn as the ribbing,on the larger size needles (we used US size 8), knit 26 stitches, drop the yarn (DO NOT CUT) and pick up your next color.  Knit 26 more stitches drop it and pick up the next color.  Knit 26 stitches, drop it, pick up the last color and knit 27 stitches.
  5. Knit 26 more stitches with your last color, drop it and pick up you ribbing color yarn when you reach where it is hanging.  Keep dropping and picking up yarn colors as they appear.  One part of each row will be twice as long in one color as the other two parts but just go with it.  And yes, your yarns get tangled but deal with it however you want.
  6. Admire the magic!!
There was a bonus in this class in that we learned a brand new cast-on called a tubular cast on.  I did it completely and utterly wrong.  I am going to You Tube and my reference books to try it again as it really made a lovely edge to the ribbing.

I still don't know it all but I will continue my quest.  After all , my ex once said i was right about things 95% of the time so I just have 5% of everything else to figure out.

Have a good week!

Friday, July 8, 2011

Walker Bag Instructions

Last week I talked on the latest Women on a Mission project.  Today we tried to figure out the best way to get the walker bags efficiently put together.  These are a little more complex than the wheel chair bags that we have made in the past but the results are pretty spectacular.


Here's what we figured out.


Take note - these bags are best for the aluminum frame type walkers rather than the ones with brakes and seats.


Staffing needed:  One person serging, two sewing, one ironing/running/trimming/organizing.


Seam allowance - between 1/4" to 1/2"


Fabric cuts needed - four pieces 4" x 12" for the straps, three upholstery weight or five quilting cotton weight cut 16" x 14" for the body (and lining) and an exterior pocket, two pieces of 6" of Velcro (optional)


Handles (four 4" x 12" cuts of fabric) - Fold and press the handle fabric, wrong sides together, lengthwise then fold the long raw edges into the center of the handle and press again.  Top stitch the open edge closed and the folded edge as well.


handle


sew handle
(images from Sewing 4 Dummies)  
Trim and set aside.


Note: the Velcro, if wanted, should be attached after the bag is constructed as we have found this is the best way to make sure that pieces line up correctly.  If you don't use Velcro then the handles can tied to attach the bag to the walker.


Pocket (one 16" x 14" piece of fabric):  


Wrong sides together, along the long (16") side, sew or serge a seam creating a tube.  Turn right side out and press so that the seam you just made runs along the middle of the pocket and not on an edge.  


Top stitch one long side as the top of the pocket.  


Top stitch the other long side to one of the exterior pieces two inches from the bottom edge. 


Perpendicular to the top stitched seam you just sewed, sew one or more seams subdividing the long pocket into two or more smaller pockets.  Back stitch these seams securely at the top and bottom of the pocket.


Putting it all together


Upholstery Weight Fabric


Place the pocketed piece of fabric right sides together with the remaining piece of exterior fabric.  Serge along the sides and bottom of the bag.  Make sure you catch all the layers!


To make a 'bagged bottom' line up the side seam and bottom seam together making a pointed corner.  Serge off this tip making a four inch long seam.  Use the bottom of the pocket to estimate where to sew.  Here is a nice tutorial on how to do this.


Serge around the top of the bag making a nice clean finish.  Remember that you will be sewing only one layer of fabric!!!


Top stitch all of the serged seams, except the top.  You may be sewing through very heavy fabric so do the best you can.  The purpose here is to reinforce the serged seams and to making a nicer finish on the the interior.  Try to also sew down the serged seam in the corners as well.


Fold the top, serged edge about one inch into the interior of the bag, pin the handles, two to each side about three inches in from the nicely serged and top stitched sides.  Top stitch around the bag at least twice, once at 1/4" and again at 3/4" in from the folded top edge being sure to catch the handles both times.


Sew Velcro onto the handles (if wanted) being sure that the handles don't twist when the Velcro is pressed together.


Trim, trim and trim again.  There will a lot of thread ends no matter how careful you are so trim, trim and trim again.


Quilting Cotton Weight Fabric


I wrote a reversible tote bag set of instructions a couple of years ago and the construction of the walker bag using quilting cottons is a very similar construction method.  You can find the full instructions here.


Layer your 16" x 14" fabrics n this order:


one interior fabric face up
one interior fabric face down,
exterior fabric with the pocket face up,
exterior fabric without the pocket face down.


Serge along the sides and bottom making sure you capture all the layers.


Bag the bottom aiming for a four inch long seam.  Use the bottom edge of the pocket as a guide.  See the reversible tote bag instructions for a good picture.


Turn the bag right sides out and press well.


Press the interior and exterior fabrics about one inch into the space between the fabrics.  See the reversible tote instructions if this doesn't make sense to you.


Insert the handles, two to each side, about three inches from the side seams and pin in place. Top stitch around the bag at least twice, once at 1/4" and again at 3/4" in from the folded top edge being sure to catch the handles both times.


Top stitch the side seams, the bottom seam and bagged corners as best as you can to reinforce the serged seams.


Sew Velcro onto the handles (if wanted) being sure that the handles don't twist when the Velcro is pressed together.  

Trim and trim again although there will not be as many thread ends to finish off as the upholstery weight fabric bags it pays to check carefully just in case.


DONE!


What?  No pictures?  I sent all the fabric kits and practice bags home with the beautiful Rose but I will try to get some pictures the next time.


Want to do something simpler?  Here are the instructions for the wheel chair bags we have been making for a couple of years now.