Tuesday, June 30, 2009

When the going gets tough...

The tough go quilting.

When life goes sour there are many ways to deal with it. You can go into a funk and rant against fate. You can lash out at others in hope that it will make you feel better. You can ignore the situation and hope it will all just go away.

OR you could go quilting.

Quilting?

That's right. When life gives you lemons make lemonade or others will do it for you.

For example, a friend's mother recently passed away and it hit her hard. Words can only give comfort at the moment. Its those times late at night and in the privacy of your own home when this type of loss becomes most difficult. This is when quilters have a unique type of lemonade.

Enter the comfort quilt.

Comfort quilts are made specifically for those times when you need a little extra something to hang onto, to keep you warm and dry your tears.

In this case the friends made blocks for a quilt with my friend's mother's favorite motif... penguins! Here is what we came up with:

Is this not a wonderful quilt?

We ended up with 15 different blocks (two are on the back). I had the priviledge of putting the top and back togeher, another friend did the quilting and binding and another made and attached an embroidered label. The whole thing is about 90" x 108" - a little bigger than originally planned but I don't think it could have been smaller.

The techniques ran the gamut from traditionally pieced blocks to very detailed paper pieced blocks. Every type of applique is represented and each is unique. I am in awe of all the work put into this project by such a large cast of characters.

The next time life hands you or a friend a body blow consider answering it by making a comfort quilt for yourself or others. Any size will do and you will receive comfort in the making and give comfort in the using or gifting.
BTW - Its tough to get sixteen people in one place at one time and keep it a secret. We gave our friend her quilt at a local Starbucks where some of us meet to knit. About half of us made it. I need to thank Starbucks for putting up wth us and our antics. The staff and other customers were very generous in making sure we had all the space we needed to give and display this special quilt. I hope the rest of the friends get a chance to see this collaboratve quilt in person.

Monday, June 29, 2009

Four Patch Posie

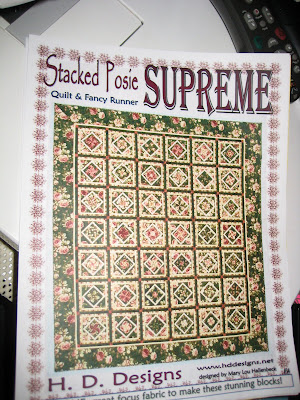
At a recent Twisted Sisters Bee meeting, someone showed a quilt in progress using whta I think she called, a four patch posie. I was definitely intrigued as it looked like a simplified One-Block Wonder.


I was thoroughly intrigued by the technique as its success or failure is completely dependent on the quilter being able to very, very, very accurately stack identical lengths of fabrics on top of one another and precisely cutting the stack so that every piece in the stack of fabric is exacty the same.


I'll wait, while those of you, who know that accurate is not my middle name or in my family tree, to have the time to laugh and get it out of your system.


Better now?

Anyway, I picked up a pattern at Jean's in Livingston during her sale and realised that the quilt project demonstrated in the pattern would never, ever be made by me.


BUT I had a wonderful piece of fabric that might be a good practice piece.


Here's what I came up with:


This may not be the most artistic quilt anyone has ever made but I think it clearly shows that I can do the required layering and cutting to get accurate blocks composed of four identical cuts of fabric.


This quilt does NOT show a particularly great choice for the size to cut the squares to make the blocks. I have been kicking myself since I finished that I have about one squre inch of fabric left so I cannot experiment with other sizes of squares.


Lessons learned:

Buy lots of fabric for this kind of experiment. I should have previewed several sizes of squares before deciding on the three inch size I used.

All quilt tops are usable not matter how ill-conceived the design may be or how much they may not fit into your home. Doggies always need new quilt but this quilt experiment will be donated to the Interfaith Quilting Bee for distribution to their charities.


Kelis trying to claim this quilt top as her own snuggle quilt.

This quilt was quilted and tied. I liked the little ties I added by couching down little bits of some pearl cotton. They add a payful touch and some extra security.

I really can cut things accurately and feel well prepared to try a One Block Wonder quilt when I need a challenge.


BTW - The quilt is shown hanging on some roofing materials stacked in my driveway. If the weather holds, I will have a new roof put on the house tomorrow. Athough Ike did not destroy my roof, it did remove most of the remaining life and the insurance company has decided to support a new roof. I am so looking forward to not worrying about my roof blowing off in the next storm as the new one is rated to withstand the force of a 100 MPH wind. Here's hoping!

Friday, June 26, 2009

Soldier Hat

The charity knit-in last week week included two projects... a stuffed bear and a hat for our soldiers over seas. I completed the hat and here it is on my unconventional hat stand (Grandma's crystal vase).
This was an easy knit and I put the instructions n a post from last week. The yarn I used was by the Queensland Collection of Rustic Wools. I used one skein and a bit of another one. Today, while I was at Twisted Yarns, I picked up another skein so I can complete another hat.

The best part about this pattern and project, is that the hats are not meant for out in the field but for use while in camp during the cold weather coming up. Hats for wearing in the field are like the traditonal balaklava and require a little bit more skill than this basic hat as well as specific yarns.

On another note ...

Today was supposed to be the day that a new roof went on the house. I got a call last night that the roof would not happen until Tuesday of next week due to ordering issues. That meant that I had the day completely free... so after our informal knitting club lesson on sock knitting the beautiful Ms. E. and I headed out to the Hen House and Twisted Yarns for yarn buyng and a lunch at the The Strake House. It was funny that we met up with our other knitting buddy at Twisted Yarns, purely by accident and got the low down on newly reduced yarns. I did not make it home until about 4:00 pm. I came home with several skeins for more socks and had a thoroughly enjoyable time.

A so much better day than enduring roof rip off and nail down.

Have a great weekend. I am going to a class on how to read Japanese knitting patterns ... which tend to be in chart form rather than the narrative style of patterns I typically use. Should be fun and a wonderful way to pick up some knitting esoterica.

Thursday, June 25, 2009

Dogs on Thursday... Sort of

Alex and the Girls joined me this morning when I was trying to get pictures of my recent forays into knitting.
First up are the two little baby hats I made out of left over sock yarn. Here's a shot of them with Kelis trying to hog the spot light.
The pattern is super simple and is a variation on a pattern published by Black Purl Patterns called Sock it to Me Baby. The variation I used was to make it in the round rather than using straight needles as in the pattern so I did not have to mess with joining a seam or purling half the stiches in the body of the hat. What I particullary liked was the finishing for the top of the hat. Instead of just joining the remaining stitches with the last of the yarn and burying the yarn in the hat, this pattern has you continue at the top of the hat into a three stitch I-Cord for a couple of inches, bury the remaining yarn into the cord and tie the cord into a knot. Very cute and very clever for a very neat finish.

Alex and Kemora had to try on these hats but really didn't like their ears gathered up in the hat. So Cute! (okay, so they look like they are being totured but still pretty cute)


I really meant to take pictures of the latest socks...8 & 9 respectively. Finally, after four pairs of socks using the same pattern, I completed a pair that have exacty the same number of rows for the legs and feet as well as I followed all of the instructions for the heels, gussetts and toes. The yarn was from J. Knits super wash wool sock yarn dyed in a color they called Rhode Island. They are super soft and comfy and washed and machine dryed beautifully.
And here are some shots of Alex and the Girls looking to get their pictures taken. For some reason I can never get them to pose nicely, instead they like to position themselves mid-frame to lick themselves, sniff the camera or look yearningly for, another, belly scratch.


Tuesday, June 23, 2009

OFA Scarves

The Orphan Foundation of America has an annual donation opportunity. They send red scarves to the young adults who have moved out of foster and are now going for post secondary education. I've written about their good work before and it still amazes me how much these kids accomplish with little or no family support.


I have already completed two scraves for this year's project.


This rusty colored one was made because I wanted to try out some yarn from Kristen Roach's Green Prarie Fibers and I wanted to work on my rib knitting. I was worried that the wool would bother my hands. Instead, it was a real pleasure to work with and made up beautifully. The pattern is from One Skein Wonders and has a simple ruffled edge and a knit on - purl one rib. The wool did felt a little bit but the scarf remains soft and subtle. Although it is not red, the project rules do allow for other colors. The Girls sure like it!

My second attempt at a scarf was prompted by a desire to try lace knitting coupled with a need to use up some left over yarn from this project. This pattern is so simple that it is easy to mess up. The whole thing, including the fringe came out to about 80", a great girly length. The pattern is a simple four plus two pattern... in other words, the width is biased on multiples of a four stitch pattern plus two more. In this case the scarf is 34 stitches wide ((8 x 4) + 2)). The stitch pattern for every row is - slip 1, purl 1, [knit 1, YO, knit two togther, purl 1] - finish the row out by repeats for the instructions in square brackets and start all over again. The fringe is about ten inches wide and I used up all my leftovers.

If you have some yarn that would work for a scarf but you are at a loss as to why you would make another scraf, try doing one for this project. I cannot think of a better cause in this day and age.

In case you are wondering, Alex was not in the chair for this photo shoot because he was driving me nuts with his newest red ball. Thanks Paul!

Saturday, June 20, 2009

Socks 6 & 7

A few days ago I finished my third full pair of socks, which, if you have been keeping count, are socks 6 & 7. I tried to count all the rows on this pair so I would have more success in keeping them exactly the same length. It was almost perfect except that one of them ended up a little short in the foot.

Aren't they cute!

The yarn is Smooshy Sock Yarn from Dream in Color Yarns in the color Pansy Go Lightly. Its pure merino super wash wool. I have already washed them once and one I put in the dryer while the other dried laid flat, as in the instructions. They both turned out a little fuzzy but feel great so the difference in drying method really didn't make a difference.

I did discover during the making up of sock 7 that I have been messing up in the decreases needed before starting the foot part of the sock. There are some decreases that need to be made every other row while I have been making them every row. I am now about half way though another pair of socks and I hope I can actually complete two whole socks as instucted in the pattern.

And the great sock adventure continues. Stay tuned!

Friday, June 19, 2009

Charity Knitting

Yesterday evening I participated in a charity knitting event at Twisted Yarns in Spring, TX and what an event it was. I arrived at the stated start time of 5:30 pm and the parking lot was already full. There were two projects avaiable - a cute little bear for chidren in stressful times and a knitted cap for the troops overseas. All of the yarn was donated either by Cascade yarns or by the shop itself.

Every possible sitting surface was in use including the floor and the step stool for putting yarns in top shelves. I estimate that there were about 40 people there and I even knew a couple of them.

This was a much more open group than the WWKIP group last weekend and I think it is because we were all working on identical projects that were relatively simple.

I chose the hat project but after seeing how the little bear came together I think I will do that with my leftovers. The hat is very basic:

Cast on 80 stitches of a worsted weight yarn on size 7 or 8 needles - circular or straight.

Knit 1 1/5" to 2" of a rib pattern like K1P1 or K2 P2

Knit in stockinette stitch until the whole thing is about eight inches long.

Then, every other row, knit 6, knit 2 together reducing the stitches between the K2T's by one.

Keep going until there are 8 stitches left, close the top, weave in ends, sew seam (if using straight needles) and you are done.

This makes a very basic watch cap style winter hat. It can be cuffed or not but I think most men would use it wthout a cuff for more coverage.

Mine is almost done and, if I hadn't spent so much time shopping, I bet I could have had it done by the end of the evening at 8:30 pm.

There are many chairty knitting sites on the web and I encourage you to check them out. Most do not require a lot of skill or yarn to get acceptabe results. My personal favorite is the Red Scarf Project that I have participated in for the past couple of years. They limit the number of scarves they will accept to five per person or organization. I have already completed two from scrap yarn and I have another skein that I picked up last night.

When I get my hat and new scarf done I will post pictures.

Thanks to Twisted Yarns for the opportunity to discover another way to use my knitting for the benefit of others. The shop's on-going project is caps for pre-mature babies. These use up left over sock yarn and I have a ton of that so I think I'll try to make a couple of those as well.

Have a great weekend and consider making something for someone you don't even know.


Tuesday, June 16, 2009

Birthday Wishes

Last week I had a birthday. Not a BIG one, just a little one. As I live alone and the dogs were away on a sleep over I got to spend most of the day exactly how I pleased so I indulged myself a whole lot.

Indulgences like raspberry jam filled donuts for breakfast (planned on two and ate four!), an onion soup mix seasoned flank steak open faced sandwich for lunch with the last of the wine from a couple of nights ago, weed pulling in the back garden (impossible to do with three little eager helpers), a great burger from Smash Burgers for dinner wih Paul and Sandy and four (tha's right FOUR!) old science fiction movies while I finished knitting up a pair of purple socks.

Not a wild day but definitely pleasant until I realized that my life has changed a whole heck of a lot from last year at this time.

Five years ago my Mom passed away and last September my Dad joined her. Without your parents around, birthdays just aren't the same as they used to be. As a child a coveted toy and cake may be used to commemorate the day. As an adult, a big check was always forhcoming with a poorly sung 'Happy Birthday' thrown in for good measure.

Now, little indulgences take the place of family centered activites. Good wishes from friends, children and siblings are graciously accepted but its just not the same.

Although I know that neither of my parents could have survived their final illnesses I am now profoundly missing them. I could really use another poorly sung rendition of 'Happy Birthday' even if the day is long gone.

Maybe they were singing in heaven on the 11th and all the other residents were cringing as I used to do ... now that brings a smile to my face!

Sunday, June 14, 2009

The Hold Everything Tote Bag - Revised

The June installment of the Stitchin Heaven Persanality monthly tote program made if off my to-do list today. The April bag is in pieces due to a significant cutting error and I skipped the May installment but June shows that the store is really learning about making me happy... not everyone but definitely me.

First of all they made up the bag in the fabrics that they sent in the package. This is so useful when you are trying to interpret the pattern with someone else's ideas of what should go where. In addition, it allowed the staff to see if the instructions for cutting and assembling the bag were correct as published ... a big bonus to know that in the middle of the night you are not nuts about a ceratin cut of fabric not fitting the bag.
The fabrics were cute western themed ones that I like. The kit they put together had the lightest fabric as the interior so its easier to find stuff in the bottom of the bag. Nice to see such good choices being made.

Instead of sending a pattern and a quilting magazine, they sent a special publication from Better Homes and Gardens entitled Bags, Pillows and Pincushions. This was a great choice as I felt I got a big bang for my buck this month as there were a lot of great ideas for future projects.

The bag went together smoothly and I only made a couple of changes.

First of all, the instructions asked for one layer of heavy weight fusible interfactig to be applied tot he exterior fabirc and straps. I didn't have any on hand so I used a layer of light weight on both the exterior and interior fabrics.

I skipped the interior pocket as I am beginning to find I don't use them in tote bags. I added a hanging cell phone pocket like here. I had a lot of scraps left over so I added some other bits and ended up with a long bag that I modeled after this one I made last year. I am hoping to use it as a place to gather all the little bits I carry around so that they will not get lost in the bottom of the tote.


The suggested stiffener for the bottom of the bag was Timtex/Peltex interfacing. I used a piece of old/stained rotary cutting mat board that I have been slowly using up in projects like this.

Now that I look at this bag again, I see that it would also make a great case for long knitting needles. I wonder if there is anyone Iknow who could use a fancy, schmancy knitting bag?

Well that will have to wait until I get some pictures taken for this post. Alex and the girls have just returned from a sleepover at Paul's and wouldn't you know it, I can't find my camera again.

ALEX!.... can't blame him anymore so here is a photo of the finshed bag... which is about 10" x 4" x 15" tall with 22" long handles, some extra trim I had lying around, a hanging cell phone pocket and a huge 18" long knitting needle bag.

Wheelchair Bags - Update

Last Monday the Once Upon a Time Bee of the KAQG met to make wheelchair bags for donating tothe local VA hospital this Fall. Only two of us showed up to sew because all of the others were on the road to various other places like San Antonio or Kentucky. Anyhow, using a bunch of orphan blocks that had been in the stash of Bee Charitable, the indominatbale Ms. J. and I made four bags and took a couple more home to finish them up.

Aren't they gorgeous!
In some of the bags the orphan block became the pocket while in some of them the pocket was left out and the block became one side of the bag. In case you missed, it the instructions are here.
I hope I get a chance to make a few more using the orphan blocks as they add a nice touch to these otherwise utilitarian bags.

Have a great week!