Showing posts with label fabric leftovers. Show all posts

Monday, June 18, 2012

Milestones

Some days milestones in our life become millstones dragging us down.


I celebrated my sixtieth birthday a couple of weeks ago which is a great milestone in my life.  I think it can now officially say that I have fewer years ahead of me than behind me.  I still get up every morning feeling that everything that happens after I wake up is a bonus.  I still can't sing in tune, dance to any known rhythm or cook like a gourmet.


My birthday has lifted a great weight off my shoulders because now I feel like I don't have the time necessary to learn to sing in tune, dance to a rhythm or cook like Julia Child before the big blackout.  Huge relief!


In other ways, being sixty has set a couple of millstones on my back.  I think I should be wiser, less impulsive and more dignified in my demeanor. I realized that it just isn't going to happen when I came across a great project to mark my birthday.


In a recent issue of Cloth, Paper, Scissors magazine I came across an article on making Prayer Flags.  The article is full of inspirational flags and I decided to mark my birthday with my own version of prayer flags...not so much that the prayers would go to God for her help but that they would remind me of things that are important to me.


There are traditionally ten flags in two sets of five colors.  My interpretation went something like this:


  1. Blue = space.. >the final frontier> rocket ship > seek > imagine
  2. White = air....wind > explosion > breathe
  3. Red = fire..  burn > cleanse > discard
  4. Green = water ..  flow > wave > sooth > dance
  5. Yellow = earth.... dirt > grow > bloom
Starting  with the ideas above, a base of marbled fabric that I had experimented with many years ago and thread that matched the prayer flag colors, this is what I came up with:


(Oops! Blogger is telling me i have run out of space event hough I am at only 52% of usge..  check out my facebook wall for an image  )


Yes, I only did five, but I can see them from my living room window and every time I glance that way, I think of the concepts shown, smile and another millstone falls off my back.  Who cares if I am not wise, less impulsive or dignified when I am sixty.  After all, I still have a few more years left, and they may come in time...or not!


Saturday, June 18, 2011

Fat Quarter Challenge

Its that time of the month when the Fat Quarter Club meets to see what everyone has done with the challenge distributed the previous month.


The challenge from May was to take a lovely, delicate paisley fat quarter and turn it into something rodeo/cowboy themed.


Again, I knew what I was going to do with it.  I have some fabric with 50's style Pin-up Cowgirls on it.  I was going to make one or more little wall hangings using this paisley as a border for these naughty ladies.


Other people came up with an embellished cowboy hat, a BBQ apron, a baby quilt, a picture frame (for a square dancing photo) and a couple of other projects that could be twisted to relate to the theme of the month.


Two days before the meeting this morning I went looking for the focus fabric and this is what I came up with:


WTF?


Where is the wall hanging?  Where are the girls?  How does a bucket relate to cowboys and rodeos?


Here was my twisted thinking...it's a feed bucket for carrying feed to the horses or for the horses to eat out of when putting on the feed bag... get it ?


So it's a bit of a stretch but I passed the challenge and ended up winning a packet of charm squares.


One thing I did learn (these is always a lesson in there somewhere), I really like to make containers... purses, bags, totes, pockets, boxes, baskets and buckets.  Even if I do not have an immediate use for this bucket, I know I will keep it around to remind me of this revelation.

Wednesday, October 20, 2010

Aloe Bog Coat

The other day I was browsing the local fabric store's clearance section looking for dress fabric.  I am taking a class in dressmking and needed something a little opaque, light weight and a flattering color to use in the class.

I did not find dress fabric but I did see a light weight canvas with a black background and a light aloe leaf printed all over it.

At $4.00 per yard plus other discounts I just couldn't pass up buying three yards of it.

Heck, it might even get made into a dress some day.

I took it home, washed and dried it and then sat on the couch with it straightening the edges and realizing that it would never make it into a dress.

Consumed with guilt about buying another useless piece of fabric, I was prepared to throw it into the donation bin when inspiration struck.

I remembered that when I was in Barcelona several years ago I bought some black trim that I was going to use in making a Chanel style jacket.  I did not make that jacket but I still had the trim.

Falling back on that jacket staple, the bog coat, I made this the other evening:


It looks a little crappy on a hanger but it looks great on with black jeans and a t-shirt.  The trim gives it just a little bit if glamor.  The trim, whem I dug it out of the trim box, turned out to be a little stretchy so it went around the neck and collar areas without any fuss. 

I think I may add a closure but I haven't found anything I like in my drawer of closures.  I 'm sure there is something in there that would be perfect but I need to dig deeper.

All in all a well spent couple of hours.

BUT I still had fabric left over.

I could have tossed the rest into the donation bin but I realized that it was a great weight for a toe bag.... a really huge tote bag.  I have a need for a really huge tote bag to hold all the fabric I have on hand for the Once Upon a Time Bee. This is what I came up with:

Not very glamorous but I boxed the bottom to the size of a bolt of fabric and it is now holding six bolts of fabric and a lot of other bits ready to go to our next sew-in.  It came out at about 24" wide by 22" tall and 12" deep.

Waste from these two projects - from the fabric the little bit I cut out for the neck of the jacket and the little strips from straightening the fabric; from the trim about 2" from the frayed ends.

As I go off and feel smug about my thriftiness I hope you are enjoying the fine fall weather.  If you get a chance, do a rain dance for us here in Houston.  Between no rain for three weeks and lots of little paws running around protecting the back yard from those evil squirrels, my lovely grass is down to dust and weeds.

Tuesday, August 24, 2010

Betty Hobo

One of the fabulous women who works on a lot of charity projects has been nicknamed Good Betty.  She is God Betty for many reasons but one is her generous nature.  She quietly works at making many quilt tops every year, mostly from her own stash, that become the backbone of many donations to charities supported by the Quilt Guild.

At a sew-in a week or so ago she came in with a really cute Hobo style bag that she had made in a class.  She was uphappy with the construction but happy with the results as the bag held a lot and was comfortable to wear.

I asked to see the pattern and the other day she gave it to me.  She does not want it back, I think, because she had such trouble wth the construction.

Here's what I came up with:

I used double faced, pre-quilted fabric that I purchased many years ago for a coat project that never happened.  One side is that wonderful floral and the other is polka dots.  I left the interior seams unfinished due to impatience but I can always go back to finish them off at a later date.  I found some ribbon to bind the edges of the pockets and another piece for the zipper fob.  The zipper was from a project that I abandoned  as impossible to complete.

I did not folow the printed instructions as I did not interface, inter-line or do any of the other bits that were avoided by my fabric choice

Thanks Good Betty for a great little purse.

Monday, July 28, 2008

And so it begins...

I have often wondered how I have built my stash of fabrics. Sometimes its because something just screams to be purchased. Sometimes I buy some fabric because someone else has bought it. Most of the time, I buy fabric because I think I need it. Herein follows the story behind a recent purchase of about 12 yards of fabric.

This saga begins with the KAQG Auction that was held back in April. I bid on a couple of the silent auction items and one of them included a beautiful red and white padded box. Its pretty large and now hold all of my beading and jewellry making stuff.


That got me to thinking how nice it would be to have other containers made with red and white fabric. Things like magazine holders, notion baskets, tote bags, wallets, quilts and other accessories. While at Laura's Fabric and gifts I saw this fabric and the wheels began to turn.

There wasn't much of the red and white fabric there so I googled the fabric and ended up at J. Caroline's Creatives. Interestingly enough this company is in Houston and someday I'm going to track them down . Until then I have started using up the red and white fabric. My first project was a hobo bag for the Bag Ladies Swap. I sent it off to Potugal without taking a picture. The fabric worked out well for it and the recipient said that it was quite functional.
Next I tried a magazine bin for my bookshelf. The pattern was on J. Caroline's web site. I think it needs a little more stiffening on the sides but all in all I like the way it looks. I will make a few more for the rest of the magazines I store and I think several will look good on my book shelves.
Next I decided to try out a tote bag. The pattern I used was in the summer Threads issue. I wanted to try making the end pockets based on their instructions and I think they are very functional. I did not make and use the bias the pattern requires because it seemed that more red and white stripes, on the bias, would cause headaches. While I was playing around with the tote I also made a large zippered pocket for the interior and a small case to corral the bits and pieces that tend to get lost in the bottom of a tote like candy and lip gloss. The bag is about eight inches tall, twelve inches wide and four inches deep.
Next up will be a quilted wallet then more bins then... who knows. From the twelve yards of fabric I originally purchased I have about nine yards left. I better get cracking on some more projects or this fabric might begin to breed on me.
So that is how stashes get built ... you see something great, buy it, then, eventually, use it up. I hope I can move on this soon as I really am out of space to store it for long periods.
Wish me luck!

Saturday, July 26, 2008

Fabric Organization

Those of us who sew have a constant battle on our hands - how to deal with our fabric leftovers. After buying and storing precious yardage we all hate to actually throw some of it away. A friend came up with the answer the other day and I have moved her idea into the path all fabric takes in this household. Here then is the life and death of fabric in my home.

Step One - usually yardage or at least fat quarters. Yardage is kept on wooden hangers, fat quarters folded neatly in drawers with other bits up to one yard in length. There it ages until ready to be used.

Step Two - something is made from the suitably aged fabric. The bits that are left over after the project is done get sorted into five subsets. Those are:
  • bits big enough for more projects are put back on the hangers or into the drawers.
  • bits big enough for other projects but I can't stand any more are sorted into a shopping bag for giving away to a charitable project that sends fabric to a sewing initiative in Mexico.
  • bits big enough to use but not even a quarter of a yard are sorted into one of two bins - one for quilting weight cottons and the other for everything else.
  • bits too small for re-use plus all the trimmings from a project are placed in an old sweatshirt for the making of a dog bed for a local animal shelter.

Step Three - fabric is used until it make its to the dog bed stage when I am finally done with it.

In the end, nothing is actually tossed out. Even bits of batting are saved for dog beds. The dog bed idea came from my friend who has been saving stuffing for months. I decided I could make my own dog beds and pass them on already completed. The dog beds are made out of old sweat shirts of which I have several. The neck and arm holes are sewn up. The bed stuffed through the waist opening and the whole thing sewn up. Alex and the girls have vetted the one I have completed as quite comfortable and, as yet, they have not destroyed it. I think its a little lumpy but the doxies don't mind. And, before you go looking for a cute picture, I have tried many times today to get one of them on the bed I have completed but they have thwarted my efforts.

Another time.

Friday, July 25, 2008

Sashiko e-book Cover

I took one of the sashiko experiments and made it into a book cover for my Sony e-book. Although the reader has a very nice leather cover I find that I am not the neatest person and spend a lot of time cleaning various foods off the cover. I guess that's what I get when I eat and read at the same time!
The details are that I used the grey twill sashiko stitch-out, cotton batting as the filler, a cord I made several years ago from leftover embroidery threads and a big, old grey button. The button has peices of 'Crystalette' (pink in reality, white in the photo) on it as an experiment in how this product works. I found it in a sale bin in Canada but it is distributed by Kandi Corp. in Clearwater, Florida. The website can be accessed here. The trim is some old dupioni from a failed project. I left the edges raw, which may have been a mistake as it seems to shed more every time I pick up the book.


This project worked and I think I will add it to my repetoire of things to make with leftovers ... besides zipper pouches and little dog toys.


Have a great weekend!

Sunday, June 8, 2008

Machine Wrapped Cording

At the Kingwood group of the Houston ASG Chapter, I had the priviledge to do some hands-on work with one of our members on machine wrapped cording. I had first encountered this technique in the book Fabric Leftovers by D'Arcy Jean Milne. I tried it out and my results sucked. I tried again on Wednesday with an expert there and my results were still sucky HOWEVER I figured out why. To do this successfully you really need a feed dog in the middle rear of the sewing field. The feed dogs on my travel sewing machine are on the sides only so I had to manually pull the base cord through the foot which meant uneven coverage. Also, a beading or cording foot would have helped a lot but I left mine at home. Here are the examples I created:
The upper piece has 20 gauge wire as part of the cording while the lower piece is just wrapped with thread. The base cording is actually three pieces of worsted weight yarn. If you would like to try this technique and see some great examples of how to use your custom cording, the folk at the Creative Textile and Quilting Arts site have a free on-line tutorial in this technique. You can access it here. This technique would be great for creating custom colored cording for purses, pillows, clothing or art quilts. When I used to do a lot of hand embroidery I would take my leftover threads at the end of a project and create cords and tassels with them. Now I have a use for leftover thread from sewing projects when I have over bought.

Try this out, you should be pleasantly surprised by the results.

Tuesday, March 25, 2008

Weekend Project #2 - Stash Crash Diet

I promised last week that I would put my stash fabric on a crash diet with the intent to donate the discarded weight to a friend to take to Mexico for a poor community there. I also promised that one large green garbage bag was my goal amount. I quickly realized that fabric weighs a lot and that I probably wouldn't be able to lift a bag of fabric. Instead I went to my shopping bag collection and filled up four of them plus a medium size shipping box. I was talking to another afriend about my self-imposed project and she suggested that scraps could go to a friend of hers who uses scraps in her creative endeavors so I filled up another large shipping bag of scraps. Here's what the pile of bags looks like in my front hall:
This was a tough project for me. I can't count the number of times I stopped to admire a partcular piece of fabric and wondered what could be done with it only to realize that I bought it for a project I completed years ago or bought it with no intent in the first place. All were put into a bag or box for someone else to use. I had to stop and laugh at myself when I came across a shoe box sized storage bin labeled 'quilt scraps'.... I was so optimistic when I was younger to think that I would have a scrap collection that would fit completely in that small container. The Mexico project is getting a lot of cottons, a ton of knits that won't work for cancer caps and hundreds of cotton and denim squares that I have cut out over the years but have been unable to use up. The scrap bag has just cotton scraps, a lot of which made me smile when I remembered the projects that generated these scraps.

The downside of this project is that I now have to reorganize the stash that remains. In my enthusiasim to find fabric to give away, I emptied a lot of containers, hangers, bags and drawers onto the guest room bed. This mountain needs to be re-organized and put back into the containers, hangers, drawers and bags so I can enjoy the space I have created for the keepers.

Warning to anyone expecting to sleep over: There is no place for you to sleep for the next few months unless you want to sleep with the dogs on a couch.

Sunday, September 16, 2007

Craft Leftovers Fun

A couple of months ago I ran across the Craft Leftovers blog ( http://craftleftovers.blogspot.com/) by Kristen Roach. Since then I have received a couple of things from her in the samplers I ordered from Home of the Sampler. One was a sample of her beautifully dyed merino sock yarn and the other was a kit to make a a dish cloth. The yarn is lovely and is on my list for purchasing when I make my next pair of socks. The dish cloth really is the best I have ever had due to the use of soft cotton with a really scratchy wool. The two crocheted together in a brick stitch make a great dish cloth that holds the soap and really scarpes off the yuck on your dishes.
I like Kristen's enthusiasim for all things crafty and her innate generosity of spirit in sharing what she knows with everyone without any ego. In August she wrote a pretty sad entry about her sewing machine dying and how she would need donations in order to get another or to get it fixed. I have quite a number of sewing machines... from a 50+ year old Singer Featherweight to my latest acquisition, the Brother 4000 embroidery machine. It so happens that an older Babylock machine of mine has been waiting for a new home. I had been scouting possible placements when I read Kristen's note. She was offered a cheapy from a discount chain store that I know would have been inadequate so I offered her my Babylock. It was in great shape and offered a zillion options not on a standard machine like an automated threader and cutter.

I was happy to pass it on to someone with an entreprenurial spirit and I hope she has much success in her business and crafty desires. Besides many gracious comments from Kristen (blush, blush) she has added me to her monthly subscription list as well as some extras. In September I received:

Two Tissue holder kits
One pencil case kit
One crocheted headband kit
One dishcloth kit
One little magazine,
Ten+ buttons
Two pieces of Vintage fabric
One vintage iron-on applique
One reusable loose tea holder
Several Craft Leftovers buttons and patches WOW!
I had a lot of fun putting the kits together and then adapting my own materials to the instructions.

Here is a picture of the kits I made up using Kristen's materials including a close-up of the cute car fabric on the interior of the pencil case. The crocheted headband (bright blue) is the first one I have owned that actually has stayed on my fat head for hours at a time. The tissue holders are completely reversible. The ribbon on the pencil case was supposed to be applied straight but went a little wonky on me. Its the perfect size for my Nintendo Game Boy Advanced and DS games.

And here is a picture of my own materials with Kristen's instructions. The Headband and wash cloth are made out of varigated kitchen cotton yarn. The headband fits very well and the cloth will probably go into my shower rather than be used in the kitchen. The fabric for the tissue holders and pencil cases is a cotton lawn from Japan printed with Martini glasses that I just love and have in two color ways!And, here is a photo of all the other bits and pieces that came in the package.

The little magazine includes instructions for a fold-over style sandwich bag, a soothing tea recipe, a soothing eye pillow idea and a bunch of ideas for keeping our creativity from becoming a burden. And check out that great fabric.... what will I do with all of this?

The subscriptions go on sale on Monday and they seemed to have sold out quickly last month. If what I have described seems like something you would like to try, please keep Kristen's enterprise in mind and shop her Etsy shop for little fun kits and other stuff.

Wednesday, August 22, 2007

A Crazy Quilting Day

Today, at the Sew Fitting neighborhood group of the Houston ASG Chapter, I was on the agenda to do a brief program on Crazy Quilting. I was nominated for this honor as I made this purse at a class by Deanna Powell of the Embroiderers' Guild of America back in the early nineties. It took me until a couple of years ago to actually finish the construction.


It really is a particularly spectacular purse... but it just leaves me cold. I did not enjoy making it but it did teach me that forced creativity doesn't work with me. Finding all the motifs and figuring out what to put on it nearly drove me to distraction - which is probably why it took me almost a decade to get it finished.

For the program I gave each of the attendees a little ziplock bag containing a whole bunch of little bits of fabric, ribbon, fibers, beads, buttons and yarns. After tacking the fabrics to a piece of muslin we worked through buttonhole/blanket stitch, cross stitch, herringbone stitch and rounded it all out with a wrapped spider web. I got to preach a little about plying stranded fibers before using them and to see some of the most creative women in Houston learn something new. They so much enjoyed our time together they asked me to come back to do another hands-on embroidery program next month. I promised to do the next program if everyone attending would make something out of their 'kit'. I didn't leave them high and dry but gave them brief instructions for creating their own copy of my purse as well as instructions on how to make a Magic Card Case as originally shown in the Winter 2006 issue of Quilting Arts magazine.
I wonder what everyone will make?
A better question would be... what will I be teaching next month? Yikes! I better get started now!

Sunday, August 5, 2007

Five Fat Quarters (cont'd)

Actually this post is a cheat.

I bought Six Fat Quarters in a beautiful pattern designed by Anna Griffin and I couldn't find any space in my fabric drawers to stuff them for later use. That made me consider that I really needed to get some use of my fat quarters which then led to the previous post on Five Fat Quarters and the making of the grocery bags.

Thus the cheat.. this post is about using up six fat quarters rather than five.

The next day, after the grocery bag frenzy, I was trying to find size 5 double pointed needles and realized that my search would have been swifter if I had my double pointed needles organized. That led to the creation of organizers for both my double pointed and circular knitting needles. The first photo below shows the cases all tied up while the second shows the interiors. I did use the embroidery machine to do the labels on the outside. The ties for the circular needle case were made from scraps while the ties for the double pointed needles were made from the ribbon that the fat quarters were wrapped in when I bought them.

And, yes, I do have a lot of double pointed needles. I inherited most of them from my mother and my grandmother. My grandmother made many pairs of socks so most of them were in her sewing box. I don't think I will ever buy a set again... unless I need size sixes... they seem to be missing from my array of sizes.
Have a good week!

Friday, August 3, 2007

Five Fat Quarters

Recently I have been embarrassed by the size of my fabric stash. I seem to have a huge amount of fabric, each scrap of which I feel I will be using any day now. In an effort to actually stop fooling myself, I have been trying to find a use for all the fat quarters I collect. I found a link to a site with a clever way of constructing grocery bags. Instead of using yardage I have modified the pattern so I can use five fat quarters at a time and end up with very few scraps. The first photo shows three bags on my Kitchen floor after a shopping trip. The second photo shows them all snuggled up in their pockets for the next trip to the store. The website with the instructions is www.craftster.org and your need to search on the word Singlet. The tutorial is excellent and the best part about it is that it seems to have been written by someone who actually sews.

Fifteen fat quarters used (5 per bag), 47 trillion left!

Thursday, July 19, 2007

Embroidery Leftovers

When I got the new sewing machine I knew I would have a lot of samples/experiments to contend with. Very organized people will take their embroidered samples, put them in a notebook and attach a detailed listing of all the settings used to embroider that particular sample. I am not that orgainzed nor do I think I would ever wish to exactly duplicate these samples in a 'good' project. Instead, I have taken my old oxford cloth shirt doodle cloth and made myself a yarn barn for when I am knitting. The whole thing ended up to be about 9 inches high and 4 1/2 inches square. The lid closes using Velcro and the stiffener in the side walls is some scrap Timtex I had been saving. It should hold the yarn for most projects. The knitting shown there is part of the arm I have been working on which is done in a great cotton blend called Bubble. The picture on the right shows the interior, lined with some lovely silky fabric I would probably never use, and holding three balls of Bubble. It does look like toilet paper but it is really yarn. Maybe I'll take my next doodle cloth and make it into a toilet paper container... Oh the possibilities!

Tuesday, May 15, 2007

Fabric Leftovers by D'Arcy-Jean Milne

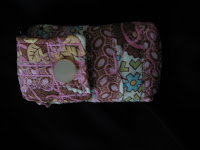
Buy this book. It is not so much that the author is presenting anything new it is just that she brings so many things together that I had not associated with each other previously. Essentilly this book is about taking scraps of fabric and thread and combining them in new and different ways. Those of us who quilt understand the concept of cutting up fabric to be recombined into a new piece of fabric. This book takes it a step further. D'Arcy Jean uses those pieces I have thrown out in the past to create magnificent new objects. I have used her inspiration on coffee cup and soda can cosies, laptop cases and a camera case with, I think, excellent results. Here is an example of a camera case I made the other day from stuff I had already thrown into the garbage after making a laptop case for my son's girlfriend. The picture's a little dark but I think you can see enough of it to distinguish the two Amy Butler fabrics I used for the laptop case. In the spirit of raw edges, the buttonhole was made by satin stititching four lines to make a rectangle and then cutting a slit between them for the button. I did cheat a little by fusing the scraps to batting before I started sewing down the scraps. Wait until you see my own laptop case... but that's for another day.